Showing posts with label Alehandra Vanhek. Show all posts
Showing posts with label Alehandra Vanhek. Show all posts
Saturday, November 30, 2019
Moonlight CT Tag and Wallpaper


Sunday, March 3, 2019
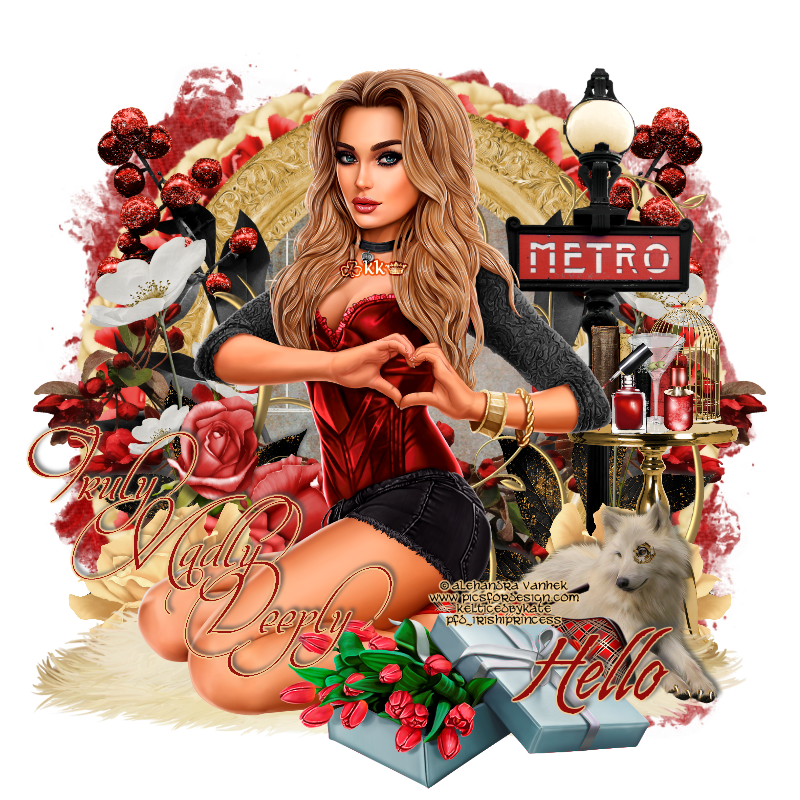
Truly CT Tag and Snags

Made using "Mysterious Seduction" From Pink Paradox Productions.
Right Click to Save your Snag in full Size



Monday, June 11, 2018
New PTU Kit - Dragon Steam

Half Fantasy, Half Steampunk, all Dragon. Matches "Mechanical Dragon" by Alehandra Vanhek.
170 Unique (non-repeated) Elements
30 1000*1000 Papers (Tagger Size)


Monday, April 2, 2018
The Giver PTU Tut

Any
resemblance to any other tutorial or signature is merely coincidental
and is not intended.
I
am using the artwork of Alehandra
Vanhek
–. You can purchase this artwork and a license to use them HERE
you MUST have a license to use this work (Fiona)
I
am using the font:
Mariposa
Sans
I
am using the Plugins:
Alien Eye Candy 5,
I
am using mask of your choice
I
am using Drop Shadow -3 Vert, 3 Hori, Opacity 74, Blur 5.8 Color
#202020
Pieces
of the kit used in this tutorial are:
-
Paper 21
-
Paper 35
-
Frame 3
-
Element 87
-
Element 213
-
Element 137
-
Element 138
-
Element 20
-
Element 115
-
Element 118
-
Element 170
-
Element 154
-
Element 113
-
Element 116
-
Element 68
-
Element 90
-
Element 108
-
Element 44
-
Element 25
-
Element 40
-
Element 99
-
Element 74
-
Element 32
-
Element 230
-
Element 206
You
must have working knowledge of PSP to complete this tutorial. This
tutorial was written using PSPX8
Open
new Canvas 800*800
New
Layer, flood fill with Paper 21,
Apply mask and resize to your liking, Merge Group
C/P
Frame
3,
resize to your liking, Use Magic wand, select inside of the frame,
Selections - expand, 5 pixels, New Layer, Flood fill with Paper 35
Paste
Full tube, resize and place to your liking, drop shadow
Element
87,
resize and Place to your liking, drop shadow
Element
213,
resize and Place to your liking, drop shadow
Element
137,
resize and Place to your liking, drop shadow
Element
138,
resize and Place to your liking, drop shadow
Element
20,
resize and Place to your liking, drop shadow
Element
115,
resize and Place to your liking, drop shadow
Element
118,
resize and Place to your liking, drop shadow
Element
170,
resize and Place to your liking, drop shadow
Element
154,
resize and Place to your liking, drop shadow
Element
113,
resize and Place to your liking, drop shadow
Element
116,
resize and Place to your liking, drop shadow
Element
68,
resize and Place to your liking, drop shadow
Element
90,
resize and Place to your liking, drop shadow
Element
108,
resize and Place to your liking, drop shadow
Element
44,
resize and Place to your liking, drop shadow
Element
25,
resize and Place to your liking, drop shadow
Element
40,
resize and Place to your liking, drop shadow
Element
99,
resize and Place to your liking, drop shadow
Element
74,
resize and Place to your liking, drop shadow
Element
32,
resize and Place to your liking, drop shadow
Element
230,
resize and Place to your liking, drop shadow
Element
206,
resize and Place to your liking
Resize
the signature if needed
The
name:
I am using the font: Mariposa
Sans,
size 20, #054689,
Apply Eye Candy #d2c2ac, Drop Shadow

Add
your copyright information and license number before save
Monday, September 19, 2016
Autumn Comfort PTU Tut

Any
resemblance to any other tutorial or signature is merely coincidental
and is not intended.
I
am using the artwork of Alehandra Vanhek –. You can purchase this artwork and a license to use them HERE
you MUST have a license to use this work (Autumn
Forrest 02)
I
am using the font: Arellion Regular
I
am using the Plugins:
Alien Eye Candy 5,
I
am using mask of your choice
I
am using Drop Shadow -3 Vert, 3 Hori, Opacity 74, Blur 5.8 Color
#202020
Pieces
of the kit used in this tutorial are:
-
Paper 29
-
Paper 18
-
Frame 13
-
Element 111
-
Element 139
-
Element 100
-
Element 179
-
Element 182
-
Element 172
-
Element 96
-
Element 171
-
Element 140
-
Element 45
-
Element 61
-
Element 98
You
must have working knowledge of PSP to complete this tutorial. This
tutorial was written using PSPX8
Open
new Canvas 800*800
New
Layer, flood fill with Paper 29,
Apply mask and resize to your liking, Merge Group
C/P
Frame
13,
resize to your liking, Use Magic wand, select inside of the frame,
Selections - expand, 5 pixels, New Layer, Flood fill with Paper 18
Paste
Full tube, resize and place to your liking, drop shadow
Element
111,
resize and Place to your liking, drop shadow
Element
139,
resize and Place to your liking, drop shadow
Element
100,
resize and Place to your liking, duplicate, mirror, drop shadow both
Element
179,
resize and Place to your liking, duplicate, mirror, drop shadow both
Element
182,
resize and Place to your liking, drop shadow
Element
172,
resize and Place to your liking, drop shadow
Element
96,
resize and Place to your liking, drop shadow
Element
171,
resize and Place to your liking, drop shadow
Element
140,
resize and Place to your liking, duplicate, mirror, drop shadow both
Element
45,
resize and Place to your liking, drop shadow
Element
61,
resize and Place to your liking, drop shadow
Element
98,
resize and Place to your liking, duplicate, mirror, drop shadow both
Resize
the signature if needed
The
name:
I am using the font: Arellion
Regular,
size 20, #cb470d,
Apply Eye Candy #dcba83,
Drop Shadow

g
Add
your copyright information and license number before save
Saturday, February 27, 2016
Tullia PTU Tut

Any
resemblance to any other tutorial or signature is merely coincidental
and is not intended.
I
am using the artwork of Alehandra
VanHek –.
You can purchase this artwork and a license to use them HERE you
MUST have a license to use this work (Tullia)
I
am using the font:
The
Shire
I
am using the Plugins:
Alien Eye Candy 5,
I
am using mask of your choice
I
am using Drop Shadow -3 Vert, 3 Hori, Opacity 74, Blur 5.8 Color
#202020
Pieces
of the kit used in this tutorial are:
-
Paper 3
-
Paper 12
-
Element 99
-
Element 88
-
Element 44
-
Element 50
-
Element 51
-
Element 84
-
Element 77
-
Element 28
-
Element 01
- Element 47
- Element 40
- Element 92
You
must have working knowledge of PSP to complete this tutorial. This
tutorial was written using PSPX8
Open
new Canvas 800*800
New
Layer, flood fill with Paper 3,
Apply mask and resize to your liking, Merge Group
C/P
Element
99,
resize to your liking, Use Magic wand, select inside of the frame,
Selections - expand, 5 pixels, New Layer, Flood fill with Paper 12
Paste
Close up Tube between Paper 12
and Element 9.
Select paper layer, select all, float, invert, Select Tube Layer
Delete, Duplicate, Mirror
the duplicate and move it into the Right frame. Merge together.
Duplicate them again
Apply Guassian blur 3.0 to bottom,
then set to Soft Light and drop Opacity to 60% to top
Paste
Full tube, resize and place to your liking, drop shadow
Element 88, resize and Place to your liking, duplicate, mirror, drop shadow bothElement 44, resize and Place to your liking, duplicate, mirror, drop shadow both
Element 50, resize and Place to your liking, duplicate, mirror, drop shadow both
Element 51, resize and Place to your liking, drop shadow
Element 84, resize and Place to your liking, drop shadow
Element 77, resize and Place to your liking, duplicate, mirror, drop shadow both
Element 28, resize and Place to your liking, duplicate, mirror, drop shadow both
Element 01, resize and Place to your liking, drop shadow
Element 47, resize and Place to your liking, drop shadow
Element 40, resize and Place to your liking, drop shadow
Element 92, resize and Place to your liking, drop shadow
Resize
the signature if needed
The
name:
I am using the font: The
Shire,
size 20, #28794a,
Apply Eye Candy #c4d382,
Drop Shadow
Add
your copyright information and license number before save

Sunday, September 6, 2015
Born a Witch PTU Tut

Any
resemblance to any other tutorial or signature is merely coincidental
and is not intended.
I
am using the artwork of Alehandra
Vanhek–.
You can purchase this artwork and a license to use them HERE you
MUST have a license to use this work (Box
with Magic)
I
am using the font: I'm
No Wizard
I
am using the Plugins: Alien Eye Candy 5,
I
am using mask of your choice
I
am using Drop Shadow -3 Vert, 3 Hori, Opacity 74, Blur 5.8 Color
#202020,
Pieces
of the kit used in this tutorial are
Paper
32
Element
12
Element
68
Element
63
Element
13
Element
16*
Element
11
Element
9
Element
8
Element
120
You
must have working knowledge of PSP to complete this tutorial. This
tutorial was written using PSPX6
Open
new Canvas 700*700
New
Layer, flood fill with Paper 32,
Apply mask and resize to your liking, Merge Group
Paste
Full tube, resize and place to your liking, drop shadow
Element
12, resize and Place to your liking, drop shadow
Element
68, resize and Place to your liking, drop shadow
Element
63, resize and Place to your liking, drop shadow
Element
13, resize and Place to your liking, drop shadow
Element
16, , resize and Place to your liking,duplicate,
Mirror
drop shadow
Element
11,
resize and Place to your liking, drop shadow
Element
9, resize and Place to your liking, drop shadow
Element
8, resize and Place to your liking, drop shadow
Element
120, resize and Place to your liking, apply Eye Candy Settings, #ef7804 Drop Shadow
Resize
the signature if needed
The
name: I am using the font: I'm
no Wizard,
size 20, #000000,
Apply Eye Candy #ef7804
Drop Shadow
Add
your copyright information and license number before save
Subscribe to:
Posts
(Atom)
MY BLINKIE

Facebook Me

Stores I Sell In


Who I CT For

 "
"
CU Licenses