Showing posts with label Alex Prihodko. Show all posts
Showing posts with label Alex Prihodko. Show all posts
Sunday, February 3, 2019
Cold Love CT Tag and Snags

Made using "Winter Sweetheart" From Pink Paradox Productions. Right Click to save your snag in full size


Thursday, December 6, 2018
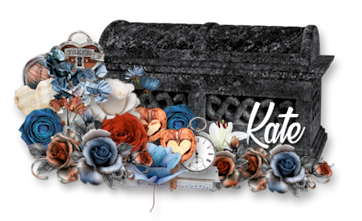
Keeper of the Stars CT Tag and Snags

This beautiful Tag and Snags are made using "Queen of Stars" From Pink Paradox Productions.
Right Click and save your Snags Full size


Sunday, September 23, 2018
New PTU Kit - Morose

A beautifully Sad kit.
160 Elements
30 1000*1000 Papers (tagger Size)
New PTU Kit - Little Monsters

Halloween!!!!!!
172 Elements
30 1000*1000 Papers (Tagger Size)
Saturday, May 26, 2018
Spring Blooms PTU Tut

Any
resemblance to any other tutorial or signature is merely coincidental
and is not intended.
I
am using the artwork of Alex
Prihodko
–. You can purchase this artwork and a license to use them HERE
you MUST have a license to use this work (Joan)
I
am using the font:
Ambiance
BT
I
am using the Plugins:
Alien Eye Candy 5,
I
am using mask of your choice
I
am using Drop Shadow -3 Vert, 3 Hori, Opacity 74, Blur 5.8 Color
#202020
Pieces
of the kit used in this tutorial are:
-
Paper 12
-
Paper 6
-
Frame 9
-
Element 108
-
Element 119
-
Element 110
-
Element 92
-
Element 115
-
Element 114
-
Element 102
-
Element 80
-
Element 94
-
Element 74
-
Element 42
-
Element 103
-
Element 95
-
Element 90
-
Element 49
-
Element 17
-
Element 4
-
Element 47
-
Element 33
-
Element 3
-
Element 123
-
Element 129
You
must have working knowledge of PSP to complete this tutorial. This
tutorial was written using PSPX8
Open
new Canvas 800*800
New
Layer, flood fill with Paper 12,
Apply mask and resize to your liking, Merge Group
C/P
Frame
9,
resize to your liking, Use Magic wand, select inside of the frame,
Selections - expand, 5 pixels, New Layer, Flood fill with Paper 6
Paste
Full tube, resize and place to your liking, drop shadow
-
Element 108, resize and Place to your liking, drop shadow
-
Element 119, resize and Place to your liking, drop shadow
-
Element 110, resize and Place to your liking, drop shadow
-
Element 92, resize and Place to your liking, drop shadow
-
Element 115, resize and Place to your liking, drop shadow
-
Element 114, resize and Place to your liking, drop shadow
-
Element 102, resize and Place to your liking, drop shadow
-
Element 80, resize and Place to your liking, drop shadow
-
Element 94, resize and Place to your liking, drop shadow
-
Element 74, resize and Place to your liking, drop shadow
-
Element 42, resize and Place to your liking, drop shadow
-
Element 103, resize and Place to your liking, drop shadow
-
Element 95, resize and Place to your liking, drop shadow
-
Element 90, resize and Place to your liking, drop shadow
-
Element 49, resize and Place to your liking, drop shadow
-
Element 17, resize and Place to your liking, drop shadow
-
Element 4, resize and Place to your liking, drop shadow
-
Element 47, resize and Place to your liking, drop shadow
-
Element 33, resize and Place to your liking, drop shadow
-
Element 3, resize and Place to your liking, drop shadow
-
Element 123, resize and Place to your liking, drop shadow
-
Element 129, resize and Place to your liking, drop shadow
Resize
the signature if needed
The
name:
I am using the font: Ambiance
BT,
size 20, #ff99ca,
Apply Eye Candy #ffffff,
Drop Shadow

Add
your copyright information and license number before save

Sunday, January 21, 2018
Dreams PTU Tut

Any
resemblance to any other tutorial or signature is merely coincidental
and is not intended.
I
am using the artwork of Alex
Prihodko
–. You can purchase this artwork and a license to use them HERE
you MUST have a license to use this work (Star
Fairy)
I
am using the font:
Celestial
Typeface
I
am using the Plugins:
Alien Eye Candy 5,
I
am using mask of your choice
I
am using Drop Shadow -3 Vert, 3 Hori, Opacity 74, Blur 5.8 Color
#202020
Pieces
of the kit used in this tutorial are:
-
Paper 3
-
Paper 1
-
Frame 2
-
Leaves 2
-
Flower 2
-
Flower
-
Star and Net
-
Star Mobile
-
Cloud 2
-
Swirls
-
Stars Jar
-
Book
-
Star Unicorn
-
Word Art
-
Sparkles
You
must have working knowledge of PSP to complete this tutorial. This
tutorial was written using PSPX8
Open
new Canvas 800*800
New
Layer, flood fill with Paper 3,
Apply mask and resize to your liking, Merge Group
C/P
Frame
3,
resize to your liking, Use Magic wand, select inside of the frame,
Selections - expand, 5 pixels, New Layer, Flood fill with Paper 1
Paste
Full tube, resize and place to your liking, drop shadow
Leaves
2,
resize and Place to your liking, duplicate, mirror, drop shadow both
Flower
2,
resize and Place to your liking, duplicate, mirror, drop shadow both
Flower,
resize and Place to your liking, duplicate, mirror, drop shadow both
Star
and Net,
resize and Place to your liking, drop shadow
Star
Mobile,
resize and Place to your liking, drop shadow
Cloud
2,
resize and Place to your liking, drop shadow
Swirls,
resize and Place to your liking, drop shadow
Stars
Jar,
resize and Place to your liking, drop shadow
Book,
resize and Place to your liking, drop shadow
Star
Unicorn,
resize and Place to your liking, drop shadow
Word
Art,
resize and Place to your liking, drop shadow
Sparkles,
resize and Place to your liking, drop shadow
Resize
the signature if needed
The
name:
I am using the font: Celestial
Typeface,
size 20, #ab1e77,
Apply Eye Candy #d8e4f0,
Drop Shadow
Add
your copyright information and license number before save
Thursday, November 9, 2017
Starry Fall PTU Tut

Any
resemblance to any other tutorial or signature is merely coincidental
and is not intended.
I
am using the artwork of Alex
Prihodko
–. You can purchase this artwork and a license to use them HERE
you MUST have a license to use this work (Star
Fairy)
I
am using the font:
AuldMagick
I
am using the Plugins:
Alien Eye Candy 5,
I
am using mask of your choice
I
am using Drop Shadow -3 Vert, 3 Hori, Opacity 74, Blur 5.8 Color
#202020
Pieces
of the kit used in this tutorial are:
-
Paper 17
-
Paper 9
-
Frame 13
-
Frame 3
-
Element 80
-
Element 109
-
Element 102
-
Element 114
-
Element 105
-
Element 4
-
Element 90
-
Element 9
-
Element 18
-
Element 22
-
Element 53
-
Element 45
-
Element 62
-
Element 135
You
must have working knowledge of PSP to complete this tutorial. This
tutorial was written using PSPX8
Open
new Canvas 800*800
New
Layer, flood fill with Paper 17,
Apply mask and resize to your liking, Merge Group
C/P
Frame
13,
resize to your liking, Use Magic wand, select inside of the frame,
Selections - expand, 5 pixels, New Layer, Flood fill with Paper 9
Paste
Full tube, resize and place to your liking, drop shadow
Frame
3,
resize and Place to your liking, drop shadow
Element
80,
resize and Place to your liking, drop shadow
Element
109,
resize and Place to your liking, duplicate, mirror, drop shadow both
Element
102,
resize and Place to your liking, duplicate, mirror, drop shadow both
Element
114,
resize and Place to your liking, duplicate, mirror, drop shadow both
Element
105,
resize and Place to your liking, duplicate, mirror, drop shadow both
Element
4,
resize and Place to your liking, drop shadow
Element
90,
resize and Place to your liking, drop shadow
Element
9,
resize and Place to your liking, drop shadow
Element
18,
resize and Place to your liking, drop shadow
Element
22,
resize and Place to your liking, drop shadow
Element
53,
resize and Place to your liking, drop shadow
Element
45,
resize and Place to your liking, drop shadow
Element
62,
resize and Place to your liking, drop shadow
Element
135,
resize and Place to your liking, drop shadow
Resize
the signature if needed
The
name:
I am using the font: Ink
Blossoms,
size 20, #570f5d,
Apply Eye Candy #cf7b48,
Drop Shadow
Add
your copyright information and license number before save
Sunday, October 22, 2017
Evil Bride Show Off

Show off made using "Evil Observer" From Wicked Princess Scraps, She sells at Mysical Scraps. Tube Devil's Bride 4 by Alex Prihodko

Saturday, July 1, 2017
Beach Reader PTU Tut

Any
resemblance to any other tutorial or signature is merely coincidental
and is not intended.
I
am using the artwork of Alex
Prihodko–.
You can purchase this artwork and a license to use them HERE you
MUST have a license to use this work (Linda)
I
am using the font:
Luna
I
am using the Plugins:
Alien Eye Candy 5,
I
am using mask of your choice
I
am using Drop Shadow -3 Vert, 3 Hori, Opacity 74, Blur 5.8 Color
#202020
Pieces
of the kit used in this tutorial are:
-
Paper 16
-
Paper 14
-
Frame 18
-
Element 159
-
Element 71
-
Element 146
-
Element 74
-
Element 87
-
Element 81
-
Element 70
-
Element 63
-
Element 61
-
Element 181
-
Element 184
You
must have working knowledge of PSP to complete this tutorial. This
tutorial was written using PSPX8
Open
new Canvas 800*800
New
Layer, flood fill with Paper 16,
Apply mask and resize to your liking, Merge Group
C/P
Frame
18,
resize to your liking, Use Magic wand, select inside of the frame,
Selections - expand, 5 pixels, New Layer, Flood fill with Paper 14
Paste
Full tube, resize and place to your liking, drop shadow
Element
159,
resize and Place to your liking, duplicate, mirror, drop shadow both
Element
71,
resize and Place to your liking, drop shadow
Element
146,
resize and Place to your liking, drop shadow
Element
74,
resize and Place to your liking, drop shadow
Element
87,
resize and Place to your liking, drop shadow
Element
81,
resize and Place to your liking, drop shadow
Element
70,
resize and Place to your liking, drop shadow
Element
63,
resize and Place to your liking, drop shadow
Element
61,
resize and Place to your liking, drop shadow
Element
181,
resize and Place to your liking, drop shadow
Element
184,
resize and Place to your liking, drop shadow
Resize
the signature if needed
The
name:
I am using the font: Luna,
size 20, #4e8da6,
Apply Eye Candy #e0e3e2,
Drop Shadow
Add
your copyright information and license number before save
Subscribe to:
Posts
(Atom)
MY BLINKIE

Facebook Me

Stores I Sell In


Who I CT For

 "
"
CU Licenses