Tuesday, November 29, 2011
PTU Emerald Princess Tut

Any resemblance to any other tutorial or signature is merely coincidental and is not intended.
I am using the artwork of FallnAngel–. You can purchase her artwork and a license to use them HERE you MUST have a license to use her work
I am using the artwork of FallnAngel–. You can purchase her artwork and a license to use them HERE you MUST have a license to use her work
I am using the font: Witched
I am using plugins: Alien Eye Candy 3.1 - Glow
I am using Mask #82 from Designs by Vaybs, you can get that here
Pieces of the kit used in this tutorial are
Paper 4
Paper 11
Frame 8
Wands
Sparkles
Ring
Pendant
Bow 2
Dot Swirls 1
You must have working knowledge of PSP to complete this tutorial. This tutorial was written using PSPXII
Open new Canvas 600*600
You must have working knowledge of PSP to complete this tutorial. This tutorial was written using PSPXII
Open new Canvas 600*600
Open paper 4 and resize to 600*600. Paste apply mask and resize to your liking, Merge Group
Open Element 20 c/p to canvas, resize to your liking
Open frame 8, paste, resize to your liking
Open Paper 11, resize to 600*600. Paste under your frame, using your Magic Wand, select the inside of your frame, go to Selections,Modify, Expand, 5 pixels. Select okay, invert selection and delete leaving the inside of the frame with your paper
Take your tube and paste it under the frame, Resize to your liking, select the paper layer with your magic wand, activate your tube layer, delete the bits you don’t want. Apply Luminace Legacy
Paste your full tube layer on top, resize and place to your liking,
Wands, resize and place under the inner tube layers
Sparkles, Resize and Over the top of the frame
Ring , resize and place to your liking
Pendant, Resize and place to your liking
Bow 2, resize and place over the top of the Pendant clasp
Dot Swirls 1, resize and place under the main tube layer
Apply drop shadow to your taste. Mine are all 2*2’s
Resize the signature if needed
The name. Using the Witched size 48 Colors #10270a,Eye Candy 3.1 Glow 5 pixel, fat setting color # #ddd7d9
Drop Shadow to your liking
Add your copyright information and license number before save
FTU Christmas Joy Tut

Any resemblance to any other tutorial or signature is merely coincidental and is not intended.
I am using the artwork of FallnAngel–. You can purchase her artwork and a license to use them HERE you MUST have a license to use her work
I am using the artwork of FallnAngel–. You can purchase her artwork and a license to use them HERE you MUST have a license to use her work
I am using the font: Santa’s Sleigh Full
I am using plugins: Alien Eye Candy 3.1
I am using Daniela’s FTU kit Christmas Joy, which you can download here
Pieces of the kit used in this tutorial are
Paper 2
Paper 8
Frame 4
Element 27
Element 24
Element 22
Element 18
You must have working knowledge of PSP to complete this tutorial. This tutorial was written using PSPXII
Open new Canvas 600*600
Open paper 72 and resize to 600*600. Paste apply mask and resize to your liking, Merge Group
Open Element 20 c/p to canvas, resize to your liking
Open frame4, paste, resize to your liking
Open Paper 8, resize to 600*600. Paste under your frame, using your Magic Wand, select the inside of your frame, go to Selections,Modify, Expand, 5 pixels. Select okay, invert selection and delete leaving the inside of the frame with your paper
Take your tube and paste it under the frame, Resize to your liking, select the paper layer with your magic wand, activate your tube layer, delete the bits you don’t want. Duplicate, original layer apply Guassian Blur set on 3, drop shadow. Duplicate layer set on soft light
Paste your full tube layer on top, resize and place to your liking,
Element 27, resize and place under the inner tube layers
Element 24, Resize and place to your liking
Element 22, , resize and place to your liking
Element 18, Resize and place to your liking
Apply drop shadow to your taste. Mine are all 2*2’s
Resize the signature if needed
The name. Using the Santa’s Sleigh Full size 24 Colors #500800, Candy 3.1 Glow 5 pixel, fat setting color #FFFFF
Drop Shadow to your liking
Add your copyright information and license number before save
Friday, November 25, 2011
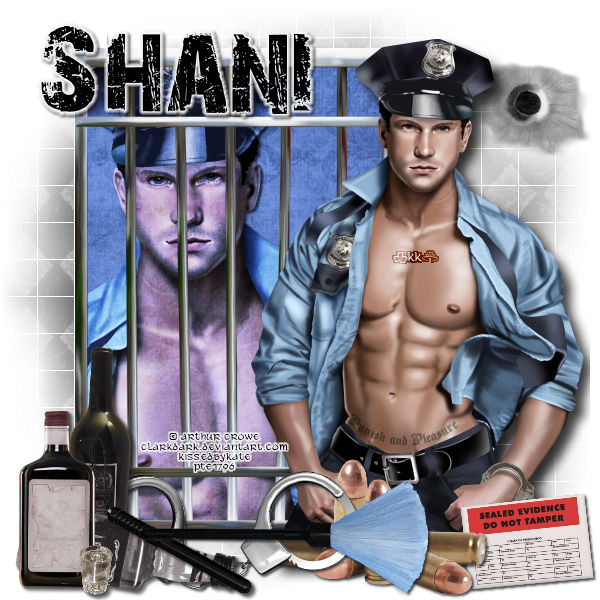
PTU Hot Cop TUT
Any resemblance to any other tutorial or signature is merely coincidental and is not intended.
I am using the artwork of Arthur Crowe You can purchase his artwork and a license to use them HERE you MUST have a license to her her work
I am using the artwork of Arthur Crowe You can purchase his artwork and a license to use them HERE you MUST have a license to her her work
I am using the font: 28 Days Later
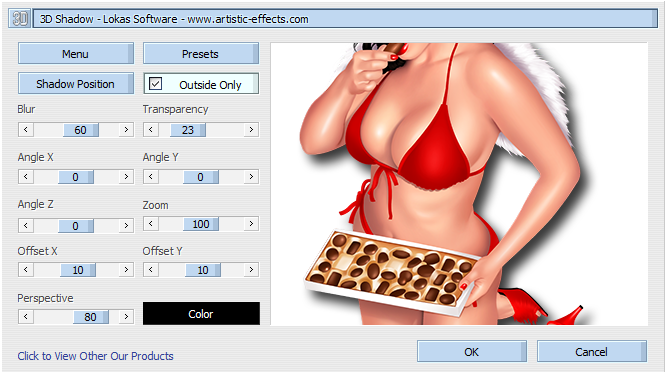
I am using plugins: Lokas 3-D
Pieces of the kit used in this tutorial are
PP8
PP9
Jaildoor
Bullet hole Spray
Bullets
Evidence label 2
Alcohol
Baton 2
Cuffs1
Brush
You must have working knowledge of PSP to complete this tutorial. This tutorial was written using PSPXII
Open new Canvas 600*600
Open new Canvas 600*600
Open PP8 and resize to 600*600. Paste apply mask and resize to your liking, Merge Group,
Open Jaildoor c/p to canvas, resize to your liking.
Open PP9, resize to 600*600. Paste under the jail door, use your selection tool and go around the outside of the bars, invert selection and delete leaving the inside of the door with your paper.
Take the close up of the tube and put it under the jail door. Use the wand to select the outside of PP9, Invert, Delete, apply Hard Light. Take the full tube and paste it and move it to the right side of the siggy, apply Lokas 3-D
Bullet Hole Spray, resize to your liking and place on top of Mask
Bullets, Resize and set over the bottom of your tube
Evidence label Two, Resize and rotate to your liking, place under bullets to the Right
Alcohol, resize and place on the left side over the jail door
Baton 2, flip, resize and place over the alcohol bottles
Cuffs 1 Resize and place behind the Alcohol bottles
Brush, Resize and place on top of the other elements
Apply drop shadow to your taste. Mine are all 2*2’s
Resize the signature if needed
The name. 28 Days Later size 28 Color #000000, apply Eye Candy 3.1 Glow color FFFFF, Fat, Pixels 3
Drop Shadow to your liking
Add your copyright information and license number before save
Wednesday, November 16, 2011
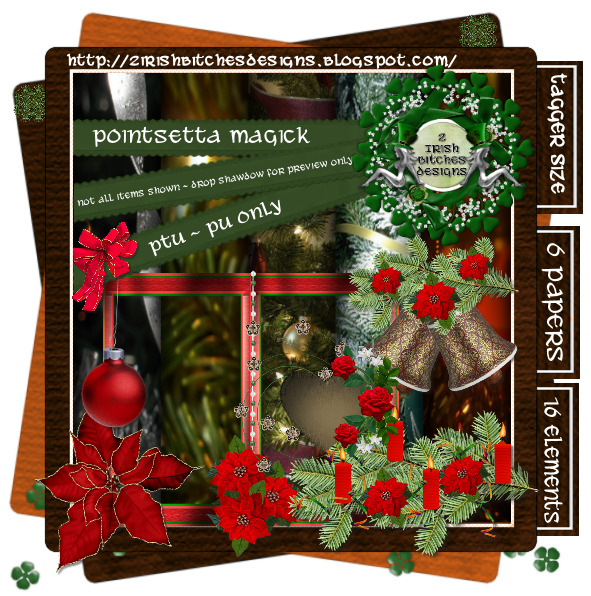
Tag Showoff featuring Pointsetta Magick

Tuesday, November 15, 2011
New PTU Kit - Pointsetta Magick
Thursday, October 27, 2011
Chef Otelia Cupcake PTU Tut

Any resemblance to any other tutorial or signature is merely coincidental and is not intended.
I am using the artwork of Anna 4X You can purchase his artwork and a license to use them HERE you MUST have a license to her her work
I am using the artwork of Anna 4X You can purchase his artwork and a license to use them HERE you MUST have a license to her her work
I am using Wicked Princess Scraps PTU kit “Chef Otelia” You can purchase that here
I am using the font: Comic San Serf, Civitype
I am using plugins:, Lokas 3D,
Pieces of the kit used in this tutorial are
PP6
PP9
Heart Frame
Bead Splatter
Canister
Chef Hat 2
Chococupcake
Cupcakewhite
Potholder
Licorice
Wooden Spoon
Wisk
Tired Cake
You must have working knowledge of PSP to complete this tutorial. This tutorial was written using PSPXII
Open new Canvas 600*600
You must have working knowledge of PSP to complete this tutorial. This tutorial was written using PSPXII
Open new Canvas 600*600
Open PP6 and resize to 600*600. Paste apply mask and resize to your liking, Merge Group,
Open Heart Frame c/p to canvas, resize to your liking.
Open PP9, resize to 600*600. Paste under your frame, using your Magic Wand, select the inside of your frame, go to Selections, Modify, Expand, 3 pixels. Select okay, invert selection and delete leaving the inside of the frame with your paper.
Take your tube and paste it on top of the frame. Use the wand to select the outside of PP9, and erase the bottom of the tube so it looks like she’s inside the tube. Apply Lokas 3D effect
Bead Splatter, rezsize to your liking and place over the top of the mask
Canister, resize and place over the bottom of the tag, were you erased the bottom of the tube, Duplicate and Mirror. Use The Comic font, color black, size 4 and put the words “Sugar” on one canister plaque, and “Spice” on the other
Chef Hat 2 resize and place to your liking
Chococupcake, resize and place to your liking
Cupcakewhite, resize and place to your liking
Potholder, resize and place to your liking
Licorice, resize,duplicate, and place to your liking
Wooden spoon, Resize and place to your liking
Whisk, Resize and place to your liking
Tired Cake, place under the frame, erase the bits that sticks out. Duplicate, Mirror, set them on either side of the tube
Apply drop shadow to your taste. Mine are all 2*2’s
Resize the signature if needed
The name. Using Civitype size 36 Color #ea5797, drop shadow
Drop Shadow to your liking
Add your copyright information and license number before save
Monday, October 17, 2011
PTU Lobotomy Tut

Any resemblance to any other tutorial or signature is merely coincidental and is not intended.
I am using the artwork of Anna Garrett Blair–. You can purchase his artwork and a license to use them HERE you MUST have a license to her his work
I am using the artwork of Anna Garrett Blair–. You can purchase his artwork and a license to use them HERE you MUST have a license to her his work
I am using the font AtlandsketchesBB and Crazy Milktop Girl
I am using plugins: Lokas 3d Shadow, Alien Eye Candy 3.1 Glow
Pieces of the kit used in this tutorial are
PP12
PP14
Frame3
Chained Heart
Splatter 1
Ball and Chain
Cuffs
Bloody Hand
You must have working knowledge of PSP to complete this tutorial. This tutorial was written using PSPXII
Open new Canvas 600*600
Open PP12 and resize to 600*600. Paste apply mask and resize to your liking, Merge Group,
Open Frame3 c/p to canvas, resize and rotate to your liking.
Open PP14, resize to 600*600. Paste under your frame, using your Magic Wand, select the inside of your frame, go to Selections, Modify, Expand, 3 pixels. Select okay, invert selection and delete leaving the inside of the frame with your paper.
Take your tube and paste it under the frame, I Mirror, Hard light.
Paste your full tube layer on top, resize and place to your liking, Apply Lokas 3-D plug in
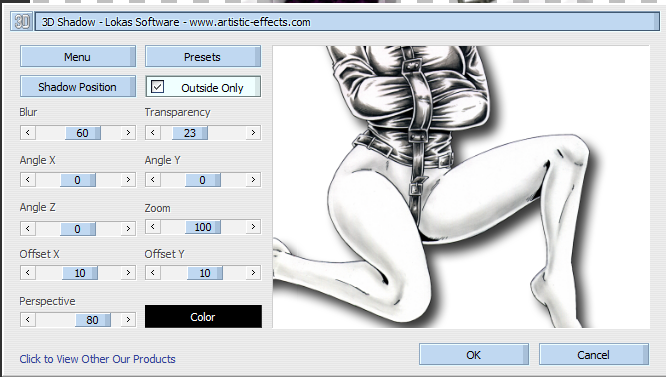
Chained Heart, resize and place to your liking
Splatter 1 Resize and place to your liking
Ball and Chain resize and place to your liking
Cuffs, resize and place to your liking
Bloody Hand resize and place to your liking
Apply drop shadow to your taste. Mine are all 2*2’s
Resize the signature if needed
Saying: AtlandsketchesBB 00000 Size 26. Selections, from Vector object. Selections, Modify, Expand 3 pixels. New Raster layer, flood fill with fffff,
The name. Using Crazy Milktop Girl size 16 color 00000. Alien Eye Candy 3.1 Glow. Fat, Pixels 3 color fffff
Drop Shadow to your liking
Add your copyright information and license number before save
Tuesday, October 11, 2011
PTU Tut Smokin

Any resemblance to any other tutorial or signature is merely coincidental and is not intended.
I am using the font
I am using plugins: DBS Flux, Alien Eye Candy 3.1, Alien Skin Xenofex 2.0 Lokas 3-D Shadow,
Pieces of the kit used in this tutorial are
PP7
PP1
Paper 17
Laceframe
Beaded Swirl
Martini Glass
Gem
Champaign Bottle
Bow
Pianokeyswave
You must have working knowledge of PSP to complete this tutorial. This tutorial was written using PSPXII
Open new Canvas 600*600
Open PP7 and resize to 600*600. Paste apply mask and resize to your liking, Merge Group, DBS Flux, Bright Noise, Intensity 27, Mixed
Open Laceframe c/p to canvas, resize to your liking. Alien Eye Candy 3.1, Glow pixels 2, Fat, Color #fffff
Open PP1, resize to 600*600. Paste under your frame, using your Magic Wand, select the inside of your frame, go to Selections, Modify, Expand, 3 pixels. Select okay, invert selection and delete leaving the inside of the frame with your paper. Xenofex, Constellation
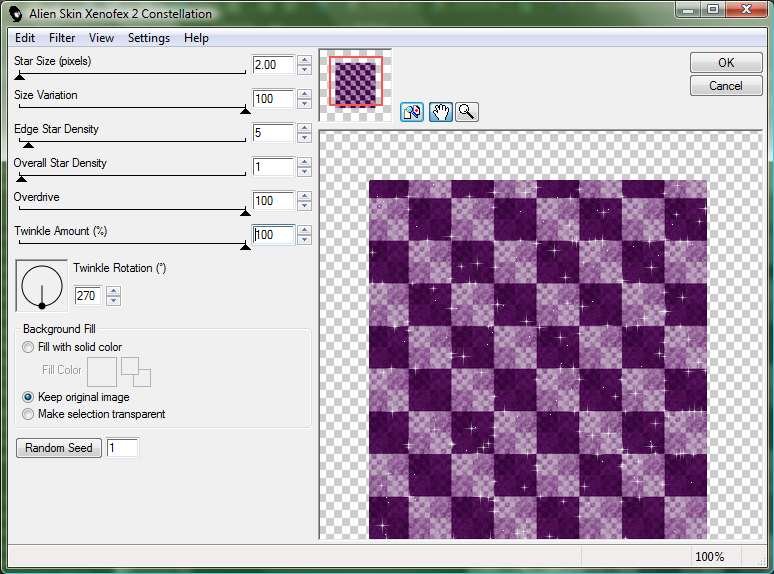
Take your tube and paste it under the frame, I used the close up, mirrored and set it to Luminacy Legacy
Paste your full tube layer on top, resize and place to your liking, Apply Lokas 3-D plug in
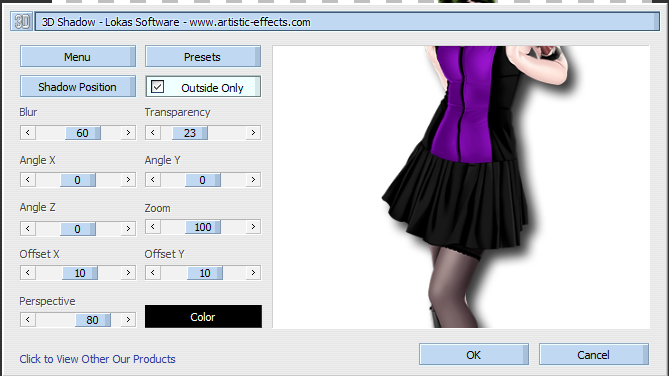
Beaded Swirl, resize and place to your liking, duplicate and repeat, apply same Xenofex Bright Noise settings
Martini Glass, Resize and place to your liking, use Xenofex on the pink in the glass
Gem, resize and place to your liking
Champaign Bottle, resize and place to your liking
Bottle 01, resize and place to your liking
Bow, resize and place to your liking
Pianowavekeys behind everything else, resize and place to your liking
Apply drop shadow to your taste. Mine are all 2*2’s
Resize the signature if needed
The name. Using Baroque Script size 36 Colors #1d1221,Eye Candy 3.1 Glow 2 pixel, fat setting color #fffff
Drop Shadow to your liking
Add your copyright information and license number before savePTU Boo Man Boo Tut

Any resemblance to any other tutorial or signature is merely coincidental and is not intended.
I am using the artwork of Ismael Rac –. You can purchase his artwork and a license to use them HERE you MUST have a license to use his work
I am using the artwork of Ismael Rac –. You can purchase his artwork and a license to use them HERE you MUST have a license to use his work
I am using the font HalloweenBene_Cryptic
I am using plugins: Lokas 3-D Shadow,
Pieces of the kit used in this tutorial are
Paper 07
Paper 17
Frame 01
Scatter01
Bat 03
Jack 02
Candles
Cauldron
Bottle 01
You must have working knowledge of PSP to complete this tutorial. This tutorial was written using PSPXII
Open new Canvas 600*600
Open paper 07 and resize to 600*600. Paste apply mask and resize to your liking, Merge Group
Open Frame 01 c/p to canvas, resize to your liking
Open Paper 17, resize to 600*600. Paste under your frame, using your Magic Wand, select the inside of your frame, go to Selections, Modify, Expand, 5 pixels. Select okay, invert selection and delete leaving the inside of the frame with your paper
Take your tube and paste it under the frame, I used the close up, mirrored and set it to hard light
Paste your full tube layer on top, resize and place to your liking, Apply Lokas 3-D plug in.
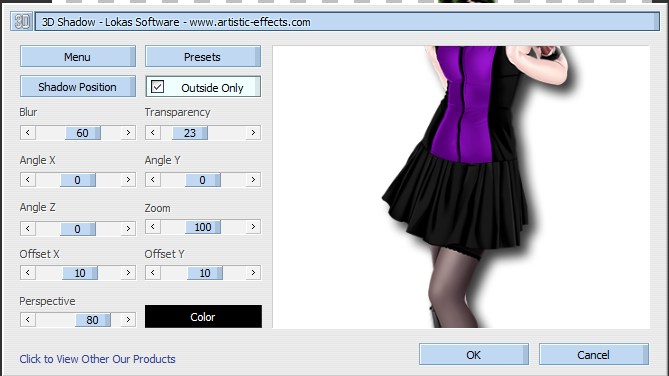
Scatter01, resize and paste over your mask
Bat 03, resize and place to your liking, duplicate and repeat
Jack02, Resize and place to your liking
Candles, behind the pumpkin resize and place to your liking
Cauldron Resize and place under the pumpkin
Bottle 01, resize and place to your liking
Apply drop shadow to your taste. Mine are all 2*2’s
Resize the signature if needed
The name. Using the HalloweenBene_cryptic size 36 Colors #a6ba44, Candy 3.1 Glow 2 pixel, fat setting color #9e4ce5
Drop Shadow to your liking
Add your copyright information and license number before saveing
Wednesday, October 5, 2011
Classic Love Tut

Any resemblance to any other tutorial or signature is merely coincidental and is not intended.
I am using the artwork of Dominic Marco –. You can purchase his artwork and a license to use them HERE you MUST have a license to use his work
I am using the artwork of Dominic Marco –. You can purchase his artwork and a license to use them HERE you MUST have a license to use his work
I am using the font Back Hand Brush
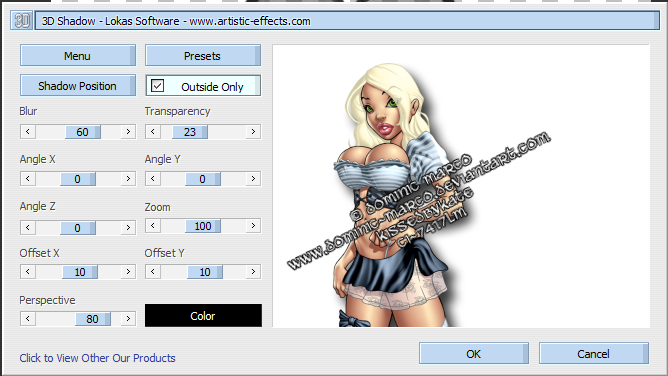
I am using plugins: Lokas 3-D Shadow, Eye Candy 3.1
Pieces of the kit used in this tutorial are
Paper 7
Glitter Paper 1
Element 20
Element 13
Element 24
Element 23
Element 16
You must have working knowledge of PSP to complete this tutorial. This tutorial was written using PSPXII
Open new Canvas 600*600
Open paper 7 and resize to 600*600. Paste apply mask and resize to your liking, Merge Group
Open Element 20 c/p to canvas, resize to your liking
Open Glitter Paper 1, resize to 600*600. Paste under your frame, using your Magic Wand, select the inside of your frame, go to Selections,Modify, Expand, 5 pixels. Select okay, invert selection and delete leaving the inside of the frame with your paper
Take your tube and paste it under the frame, I used the close up, pasted, duplicated and mirrored it, setting them side by side. use your magic wand to select her eyes, invert Effects, Photo, Black and white flim, Repeat on both layers
Paste your full tube layer on top, resize and place to your liking, Apply Lokas 3-D shadow plug in
Element 13, Mirror, resize and place to your liking.
Element 24, Resize and place to your liking
Element 23, behind the frame, resize and place to your liking
Element 16, Resize and place to your liking
Apply drop shadow to your taste. Mine are all 2*2’s
Resize the signature if needed
The name. Using the Eldoroado, size 24 Colors #fffff, Candy 3.1 Glow 5 pixel, fat setting color #00000
Drop Shadow to your liking
Add your copyright information and license number before save
Subscribe to:
Posts
(Atom)
MY BLINKIE

Facebook Me

Stores I Sell In


Who I CT For

 "
"
CU Licenses