Search This Blog
Labels
- 2022
- A note
- A Simply Sassy Scrap Creation
- Abstract Creations
- Alec Rud
- Alehandra Vanhek
- Alena Lazareva
- Alex Prihodko
- Alfadesire
- Alica Mujica
- Amalie Designs
- Amy Marie's Kits
- Amy Mathews
- Andreea Cernestean
- Andy Cooper
- Anna Marine
- Art of Freya
- Arthur Crowe
- Artistic Angelz
- Ash Evans
- Autumn
- Awareness Blog Train
- Barbara Jensen
- Bee Hive Studio
- Bella Caribena
- Bella Designs
- Blissful Designs
- Blog Train
- Bookworm Designs
- CDO
- CDO kit
- Celinart
- Chaos Priestess
- Charity
- Chili Designs
- ChocUKDesigns
- Chris DeLara
- Chris Pastel
- Christmas
- Clare Bertram
- Clipart
- Cluster Frame
- Collab
- Coming Soon
- Creation by Sanie
- Creative Scraps by Crys
- Creative Team Call
- Creativecrazyscraps Blog Train
- Crystal's Creations
- CT
- CT Call
- CT Tag
- CU
- Cuddly Rigor Mortis
- Cute Loot
- Daily Special
- Dance in the Rain
- Danny Lee
- Dawn 2 Dusk
- Delphine Demers
- Denis Prenzel
- Desi Sparkles
- Designs by Baby Dragon
- Designs by Vi
- Desirina's Designs
- Di Halim
- Disco Science
- Ditzy Designs
- DNS Scraps
- Doctor Who
- Dominic Marco
- Dragon Burned Creationz
- DRAN Designs
- DRAN Designs Blog Train
- Elias Chatzoudis
- Elvenstar Art
- Enamorte
- Enys Guerrero
- Equality
- Eugene Rhevskii
- Exclusive
- Facebook Freebie
- FallnAngel
- Fantastically Free Blog Train
- Fiodorova
- Former Exclusive Kits
- Freebie
- Freeks Creations
- FTU CU
- FTU Kit
- Gabi Spree
- Gay Pride
- Gemini Creations
- Gimptastic Kits
- Gimptastic Scraps
- Halloween
- Hania's Designs
- Happy Pumpkin Studio
- House of Dragus
- IB Kit
- Ingrid Crowe
- Inzpiredcreationz
- IPD
- IPD CU
- IPD Kit
- IPD TOU
- Ismael Rac
- Janna Prosvirina
- Jasmine Becket-Griffith
- Jennifer Janesko
- Jessica Daughtery
- Johanna Von Frankenstein
- Jose Cano
- Joy's Designs
- Julia Fox
- Kajenna
- Kandii Popz Designs
- Karmalized Scraps
- Katherine
- Keith Garvey
- Killer Kitty's Killer Kreations
- KIT
- Kiwi Fire Storm
- Kizzed by Kelz
- Lady Mishka
- Laguna
- Lightartist XXX
- Lil Miss Brainstorm
- Lysisange
- Lysria's Graphic World
- Magic Creations
- Mariel Designs
- Markia
- Martin Abel
- Maryline Cazenave
- Mask
- Maxx Carter
- Mélanie Delon
- Michael Calandra
- Michelle's Myths
- Millie's PSP Madness
- Misticheskaya
- MMeliCrea Designz
- Molly Harrison
- Moonshine Dezinez
- Mysterfeerie Creations
- Mystical Scraps
- Nina's Graphix
- Niqui's Designs
- No Flutter
- Nocturne
- P-O Concept
- Pin Up Toons
- Pink Paradox Productions
- PinkyT
- Pinup Fantasies & Faerie Tales
- Pride
- PTU
- PTU Cluster Set
- PTU CU
- PTU KIT
- PTU Kits
- Purple's Kreations
- Queen Uriel
- Quick Page
- Rebecca Sinz
- Rebellious Scraps
- Reineke Designs
- Renee Biertempfel
- Rieneke's Designs
- Rissa's Designs
- Rockabilly Roadhouse Collab
- Roman Zaric
- Rossana Castellino
- Sale
- Sara Butcher
- Scottish Butterfly Creations
- Scrap Candy Store
- Scrap Kits
- Scrappin with lil ole Me
- Scrappin' Your ♥ Out Blog Train
- Scrazy Scraps
- Selisan Al Gaib
- Sheena Pike
- Showoffs
- Simona Candini
- Skittlez Skrapz
- Smiley Creations Shop
- Snags
- SoxSational Scraps
- Spazz
- Special
- SSDesigns
- Stan Dudin
- Stella Felice
- STS Scraps
- Sweet Pin Up
- Sweet Tooth Studio
- Sybile Art
- Tajana
- Tasha's Playground
- Ted Hammond
- templates
- Tezza's Designz
- The Hunter
- The Psp Project
- Thrifty Scraps
- Thrifty Scraps by Gina
- Tiffany Toland-Scott
- Tiny Turtle Designs
- Tiny Turtle Store
- Titjana
- Tony T
- Toria
- TOU
- Toxic Desirez
- Trinita
- tut
- tutorial
- tutorials
- Vadis
- Very Many
- Victoria Fox
- Vinegar
- Wallpaper
- Watermark
- Weekend Special
- Whispy's D'zines
- Wicked Creationz
- Wicked Diabla Designs
- Wicked Princess Scraps
- Word Art
- Yuki
- Zindy
- Zlata_Ma
Tuesday, November 29, 2011
PTU Emerald Princess Tut
Any resemblance to any other tutorial or signature is merely coincidental and is not intended.
I am using the artwork of FallnAngel–. You can purchase her artwork and a license to use them HERE you MUST have a license to use her work
I am using the artwork of FallnAngel–. You can purchase her artwork and a license to use them HERE you MUST have a license to use her work
I am using the font: Witched
I am using plugins: Alien Eye Candy 3.1 - Glow
I am using Mask #82 from Designs by Vaybs, you can get that here
Pieces of the kit used in this tutorial are
Paper 4
Paper 11
Frame 8
Wands
Sparkles
Ring
Pendant
Bow 2
Dot Swirls 1
You must have working knowledge of PSP to complete this tutorial. This tutorial was written using PSPXII
Open new Canvas 600*600
You must have working knowledge of PSP to complete this tutorial. This tutorial was written using PSPXII
Open new Canvas 600*600
Open paper 4 and resize to 600*600. Paste apply mask and resize to your liking, Merge Group
Open Element 20 c/p to canvas, resize to your liking
Open frame 8, paste, resize to your liking
Open Paper 11, resize to 600*600. Paste under your frame, using your Magic Wand, select the inside of your frame, go to Selections,Modify, Expand, 5 pixels. Select okay, invert selection and delete leaving the inside of the frame with your paper
Take your tube and paste it under the frame, Resize to your liking, select the paper layer with your magic wand, activate your tube layer, delete the bits you don’t want. Apply Luminace Legacy
Paste your full tube layer on top, resize and place to your liking,
Wands, resize and place under the inner tube layers
Sparkles, Resize and Over the top of the frame
Ring , resize and place to your liking
Pendant, Resize and place to your liking
Bow 2, resize and place over the top of the Pendant clasp
Dot Swirls 1, resize and place under the main tube layer
Apply drop shadow to your taste. Mine are all 2*2’s
Resize the signature if needed
The name. Using the Witched size 48 Colors #10270a,Eye Candy 3.1 Glow 5 pixel, fat setting color # #ddd7d9
Drop Shadow to your liking
Add your copyright information and license number before save
Labels:CT,tutorials | 0
comments
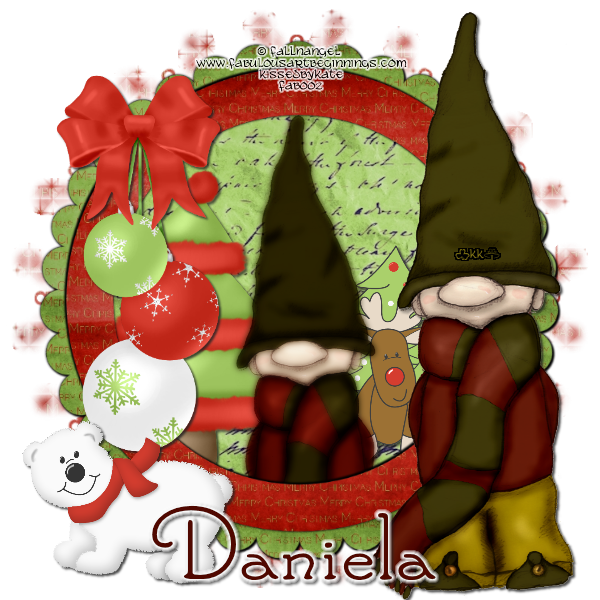
FTU Christmas Joy Tut
Any resemblance to any other tutorial or signature is merely coincidental and is not intended.
I am using the artwork of FallnAngel–. You can purchase her artwork and a license to use them HERE you MUST have a license to use her work
I am using the artwork of FallnAngel–. You can purchase her artwork and a license to use them HERE you MUST have a license to use her work
I am using the font: Santa’s Sleigh Full
I am using plugins: Alien Eye Candy 3.1
I am using Daniela’s FTU kit Christmas Joy, which you can download here
Pieces of the kit used in this tutorial are
Paper 2
Paper 8
Frame 4
Element 27
Element 24
Element 22
Element 18
You must have working knowledge of PSP to complete this tutorial. This tutorial was written using PSPXII
Open new Canvas 600*600
Open paper 72 and resize to 600*600. Paste apply mask and resize to your liking, Merge Group
Open Element 20 c/p to canvas, resize to your liking
Open frame4, paste, resize to your liking
Open Paper 8, resize to 600*600. Paste under your frame, using your Magic Wand, select the inside of your frame, go to Selections,Modify, Expand, 5 pixels. Select okay, invert selection and delete leaving the inside of the frame with your paper
Take your tube and paste it under the frame, Resize to your liking, select the paper layer with your magic wand, activate your tube layer, delete the bits you don’t want. Duplicate, original layer apply Guassian Blur set on 3, drop shadow. Duplicate layer set on soft light
Paste your full tube layer on top, resize and place to your liking,
Element 27, resize and place under the inner tube layers
Element 24, Resize and place to your liking
Element 22, , resize and place to your liking
Element 18, Resize and place to your liking
Apply drop shadow to your taste. Mine are all 2*2’s
Resize the signature if needed
The name. Using the Santa’s Sleigh Full size 24 Colors #500800, Candy 3.1 Glow 5 pixel, fat setting color #FFFFF
Drop Shadow to your liking
Add your copyright information and license number before save
Labels:CT,FallnAngel,tutorials | 0
comments
Friday, November 25, 2011
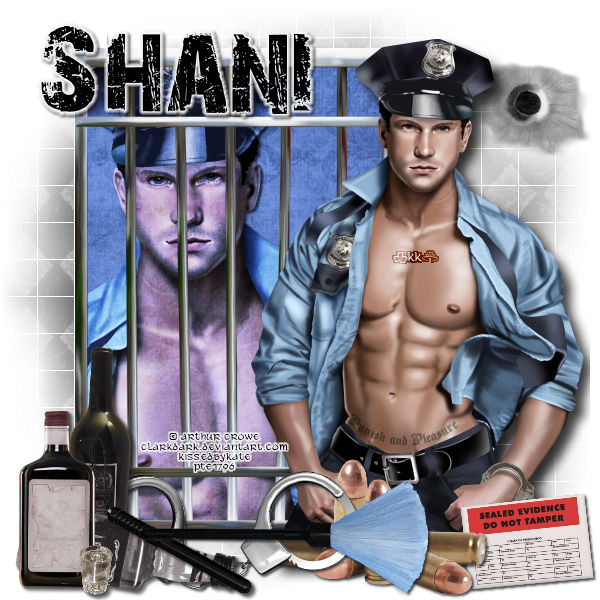
PTU Hot Cop TUT
Any resemblance to any other tutorial or signature is merely coincidental and is not intended.
I am using the artwork of Arthur Crowe You can purchase his artwork and a license to use them HERE you MUST have a license to her her work
I am using the artwork of Arthur Crowe You can purchase his artwork and a license to use them HERE you MUST have a license to her her work
I am using the font: 28 Days Later
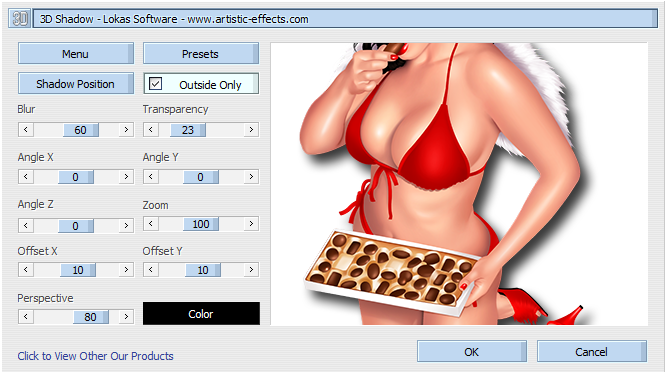
I am using plugins: Lokas 3-D
Pieces of the kit used in this tutorial are
PP8
PP9
Jaildoor
Bullet hole Spray
Bullets
Evidence label 2
Alcohol
Baton 2
Cuffs1
Brush
You must have working knowledge of PSP to complete this tutorial. This tutorial was written using PSPXII
Open new Canvas 600*600
Open new Canvas 600*600
Open PP8 and resize to 600*600. Paste apply mask and resize to your liking, Merge Group,
Open Jaildoor c/p to canvas, resize to your liking.
Open PP9, resize to 600*600. Paste under the jail door, use your selection tool and go around the outside of the bars, invert selection and delete leaving the inside of the door with your paper.
Take the close up of the tube and put it under the jail door. Use the wand to select the outside of PP9, Invert, Delete, apply Hard Light. Take the full tube and paste it and move it to the right side of the siggy, apply Lokas 3-D
Bullet Hole Spray, resize to your liking and place on top of Mask
Bullets, Resize and set over the bottom of your tube
Evidence label Two, Resize and rotate to your liking, place under bullets to the Right
Alcohol, resize and place on the left side over the jail door
Baton 2, flip, resize and place over the alcohol bottles
Cuffs 1 Resize and place behind the Alcohol bottles
Brush, Resize and place on top of the other elements
Apply drop shadow to your taste. Mine are all 2*2’s
Resize the signature if needed
The name. 28 Days Later size 28 Color #000000, apply Eye Candy 3.1 Glow color FFFFF, Fat, Pixels 3
Drop Shadow to your liking
Add your copyright information and license number before save
Labels:CT,tutorials | 0
comments
Wednesday, November 16, 2011
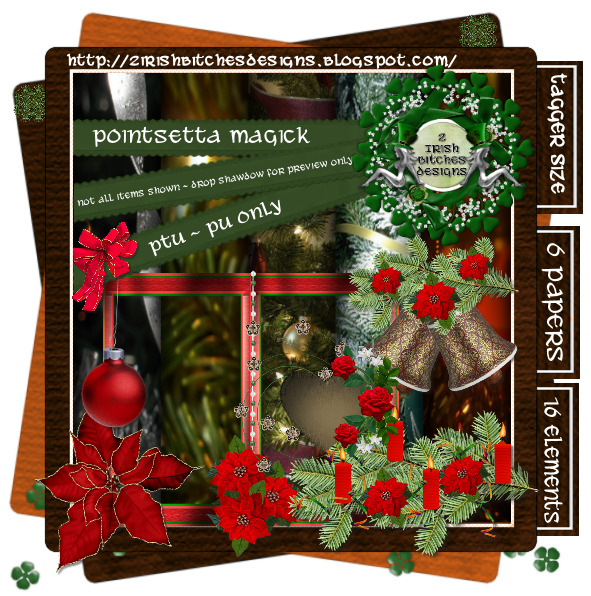
Tag Showoff featuring Pointsetta Magick
Labels:IPD Kit,PTU Kits,Showoffs | 0
comments
Tuesday, November 15, 2011
New PTU Kit - Pointsetta Magick
Labels:IPD Kit,PTU Kits | 0
comments
Subscribe to:
Comments
(Atom)
