Thursday, January 31, 2013
PTU Charity Collab

Our favorite Sassy girl is in need of some help -- so we brought together a bunch of wonderful designers and have created this amazing collaboration. You will find scrapkits, CU items, paper packs, styles, and so much more... well worth the $10.00 price, all of which goes to help Sassy get back on her feet. I am proud to say I contributed to this! You can purchase this HUGE collab in the following places:


Monday, January 28, 2013
PTU Love bites Tut

Any resemblance to any other tutorial or signature is merely coincidental and is not intended.
I am using the artwork of Anna Marine - You can purchase her artwork and a license to use them HERE you MUST have a license to use her work
I am using the font: Jellyka - Love and Passion
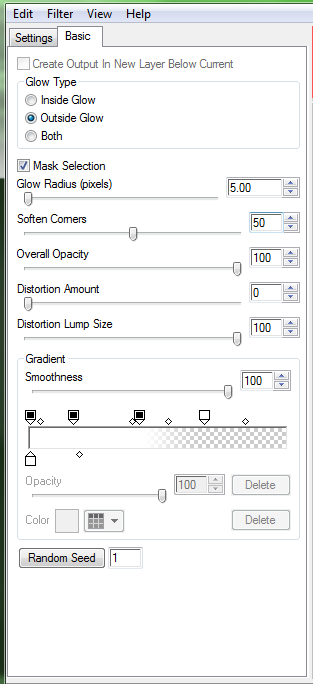
I am using plugins: Alien Eye Candy 5, Impact, Grad. Glow
I am using “Love Bites” From Rissa's Designs which you can get more info here
I am using Mask: SKDSVal Mask 7 you can get it here
I am using Drop Shadow 2 Vert, 2 Hori, Opacity 90, Blur 2 Color #202020
Pieces of the kit used in this tutorial are
RD_Paper1
RD_Paper10
RD_Frame3
RD_Snake
RD_HeartMartini
RD_StitchedHeart
RD_SkullLily
RD_Claws
RD_GothLips
RD_Rose
RD_LoveBox
You must have working knowledge of PSP to complete this tutorial. This tutorial was written using PSPXII
Open new Canvas 600*600
Open paper 1 and resize to 600*600. Apply mask and resize to your liking, Merge Group
c/p RD_Frame3, resize to your liking, Paste resized Paper10 under the mask, use magic wand, select the inside of your frame, Selections, Modify, Expand, pixels 3, okay, invert selection, delete, leaving the paper inside your frame.
Paste the CU tube under the spike frame, resize and postion to your liking, follow above and delete the extras, Duplicate, Mirror, drop shadow, drop opacity to 50%
Paste full tube over the top, line up her legs with the bottom heart of the frame, select the dark grey inside, selections, modify, expand by 1 pixel. Invert and then use your eraser to get rid of the bits of her legs you don't want, drop shadow
RD_Snake, Resize and place to your liking, under the frame,and Paper, Drop Shadow
RD_HeartMartini, Resize and place to your liking, Drop Shadow
RD_StitchedHeart, resize and place to your liking, drop Shadow both
RD_SkullLily, Resize and Place to your liking, duplicate, mirror Drop Shadow both
RD_Claws, resize and place to your liking, Under the CU tubes, duplicate, mirror, Drop Shadow Both
RD_GothLips resize, and place to your liking, Drop Shadow
RD_Rose, resize and place to your liking, Drop Shadow
RD_LoveBox, resize and place to your liking, Drop Shadow
Resize the signature if needed
The name:. Using, Jellyka - Love and Passion size 72 Colors #000000, Apply Gradient Glow, then Drop Shadow:

Add your copyright information and license number before save
PTU Seelie Magick Tut

Any resemblance to any other tutorial or signature is merely coincidental and is not intended.
I am using the artwork of Anna Marine. You can purchase her artwork and a license to use it HERE.
I am using Killer Kitty's Killer Kreations PTU kit “Seelie Magick” You can purchase that here
I am using the font: fontdinerdotcom-Sparkly
I am using Mask: WH-CMExslusice#2, you can get that here
I am using the plugins: Lokas 3-D Shadow, Alien Eye Candy 5, Impact
I am using Drop Shadow 2 Vert, 2 Hori, Opacity 90, Blur 2 Color #202020
Pieces of the kit used in this tutorial are
K4-SeelieMagick-Paper11
K4-SeelieMagick-Paper12
K4-SeelieMagick-Frame01
K4-SeelieMagick-Moon
K4-SeelieMagick-Clock
K4-SeelieMagick-Gem
K4-SeelieMagick-Candle
K4-SeelieMagick-Apple
K4-SeelieMagick-Pentagram02
K4-SeelieMagick-Sparkles01
You must have working knowledge of PSP to complete this tutorial. This tutorial was written using PSPXII
Open new Canvas 600*600
Open K4-SeelieMagick-Paper11 and resize to 600*600. Paste apply mask and resize to your liking, Merge Group,
Paste K4-SeelieMagick-Frame01 to canvas, resize to your liking.
K4-SeelieMagick-Paper12. Using your Magic Wand, select the inside of your frame, go to Selections, Modify, Expand, 5 pixels. Select okay, new layer under the frame, Flood fill, deselect
Paste CU tube between paper and Frame. Using your Magic Wand, select the inside of your frame, go to Selections, Modify, Expand, 5 pixels, select okay, invert select and delete, leaving only the part of the tube you wanted inside the frame, duplicate, mirror, apply luminance Legacy, drop Shadow.
Paste Full tube, place to your liking, Apply Lokas 3-D Shadow:

K4-SeelieMagick-Moon, resize and place over the mask, under the Frame, drop Shadow
K4-SeelieMagick-Clock, resize and place to your liking, drop shadow
K4-SeelieMagick-Gem, resize and place to your liking, drop shadow
K4-SeelieMagick-Candle, resize and place to your liking, drop Shadow
K4-SeelieMagick-Apple, resize and place to your liking, drop shadow
K4-SeelieMagick-Mask02, resize and place to your liking, drop Shadow
K4-SeelieMagick-Pentagram02, resize and place to your liking, drop shadow
K4-SeelieMagick-Sparkles01, resize and place to your liking, drop shadow
Resize the signature if needed
The name. Using fontdinerdotcom-Sparkly, Size 72, color #0e0d14. Alien Eye Candy 5, Impact, Gradient Glow Color #ffffff:
Drop Shadow to your liking
Add your copyright information and license number before save
Sunday, January 27, 2013
FTU Devine Beauty QP

FTU Devine Beauty Cluster
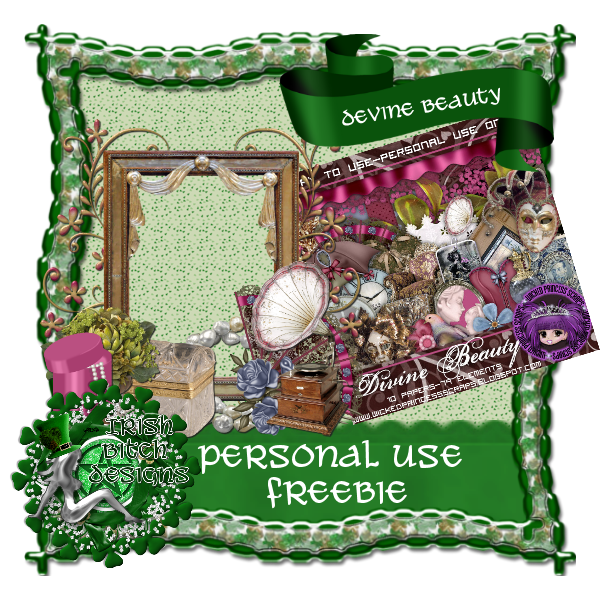
PTU Devine Beauty Tut

Any resemblance to any other tutorial or signature is merely coincidental and is not intended.
I am using the artwork of Keith Garvey. You can purchase his artwork and a license to use it HERE.
I am using Wicked Princess Scraps PTU kit “Devine Beauty” You can purchase that here
I am using the font: Trinigan FG
I am using Mask MisfitsMask#5 by Beth Ann, you can get that here
I am using the plugins: Lokas 3-D Shadow,
I am using Drop Shadow 2 Vert, 2 Hori, Opacity 90, Blur 2 Color #202020
Pieces of the kit used in this tutorial are
WP_DB_PP5
WP_DB_PP6
Frame 2
WP_DB_Bracelet
WP_DB_Gold Leaf
WP_DB_Fan
WP_DB_Box
WP_DB_Plant
WP_DB_Pearls
You must have working knowledge of PSP to complete this tutorial. This tutorial was written using PSPXII
Open new Canvas 600*600
Open WP_DB_PP5 and resize to 600*600. Paste apply mask and resize to your liking, Merge Group,
Paste WP_DB_Frame2 to canvas, resize to your liking.
Open WP_DB_PP6. Using your Magic Wand, select the inside of your frame, go to Selections, Modify, Expand, 5 pixels. Select okay, new layer under the frame, Flood fill, deselect
Paste CU tube between paper and Frame. Using your Magic Wand, select the inside of your frame, go to Selections, Modify, Expand, 5 pixels, select okay, invert select and delete, leaving only the part of the tube you wanted inside the frame, apply luminance Legacy, drop Shadow.
Paste Full tube, place to your liking, Apply Lokas 3-D Shadow:
WP_DB_Gold Leaf, resize and place over the mask, duplicate, mirror, flip, drop Shadow
WP_DB_Bracelet, resize and place to your liking, drop shadow
WP_DB_Fan, resize and place to your liking, drop shadow
WP_DB_Box, resize and place to your liking, drop shadow
WP_DB_Plant resize and place to your liking, drop Shadow
WP_DB_Grampaphone, resize and place to your liking, drop Shadow
WP_DB_Pearls, resize and place to your liking, drop shadow
Resize the signature if needed
The name. Using Trinigan FG Size 30, color #000000. Alien Eye Candy 5, Impact, Gradient Glow Color #93585c:
Drop Shadow to your liking
Add your copyright information and license number before save
Saturday, January 26, 2013
Guest CT member

Sunday, January 20, 2013
Ct Call

I will make my decision by Friday 1/25
PTU Kinky Love Tut

Any resemblance to any other tutorial or signature is merely coincidental and is not intended.
I am using the artwork of Tony T, you can purchase his artwork at here, you MUST have a license to use his work!
I am using Purple's Kreations PTU kit “Kinky Love” You can purchase that here
I am using the font: LoversQuarrelROB
I am using Mask #5 from Joyita, you can get it here
I am using the plugins: Alien Eye Candy 5, Impact
I am using Drop Shadow 2 Vert, 2 Hori, Opacity 90, Blur 2 Color #202020
Pieces of the kit used in this tutorial are
PK-KL-P3
PK-KL-P9
PK-KL-F2
PK-KL-E14
PK-KL-E39
PK-KL-E3
PK-KL-E46
PK-KL-E15
PK-KL-E5
PK-KL-E7
PK-KL-E33
Element 43
Element 42
Element 12
Element 33
Element 16
You must have working knowledge of PSP to complete this tutorial. This tutorial was written using PSPXII
Open new Canvas 600*600
Open PK-KL-P3 and resize to 600*600. Paste apply mask and resize to your liking, Merge Group,
Paste PK-KL-F2 to canvas, resize to your liking.
Open PK-KL-P9, resize to 600*600. Using your Magic Wand, select the inside of your frame, go to Selections, Modify, Expand, 5 pixels. Select okay, new layer under the frame, Flood fill, deselect
Paste CU tube between paper and Frame. Using your Magic Wand, select the inside of your frame, go to Selections, Modify, Expand, 5 pixels, select okay, invert select and delete, leaving only the part of the tube you wanted inside the frame, apply Hard Light, drop Shadow.
Paste Full tube, place to your liking, drop shadow
PK-KL-E14, resize and place to your liking, under full tube, drop shadow
PK-KL-E39, resize and place to your liking, drop shadow
PK-KL-E3, resize and place to your liking, drop shadow
PK-KL-E15, resize and place to your liking, drop Shadow
PK-KL-E5, resize and place to your liking, drop Shadow
PK-KL-E7, resize and place to your liking, drop shadow
PK-KL-E39, resize and place to your liking, drop shadow
PK-KL-E33, resize and place to your liking, drop shadow
Element 42, resize and place to your liking, drop shadow
Element 12, resize and place to your liking, drop shadow
Element 33, resize and place to your liking, drop shadow
Element 16, resize and place to your liking, drop shadow
Resize the signature if needed
The name. Using LoversQuarrelROB Size 36, color #000000. Alien Eye Candy 5, Impact, Gradient Glow Color #000000 & #ffffff:

Drop Shadow to your liking
Add your copyright information and license number before save
New PTU Kit - Fuzzy Hearts

Shades of Pinks and Golds, this is perfect for all those cute Valentine tubes.
10 papers 800*800 (tagger Size)
60 Elements
Saturday, January 19, 2013
Pink i licious PTU tut

Any resemblance to any other tutorial or signature is merely coincidental and is not intended.
I am using the artwork of Keith Garvey, you can purchase his artwork at here, you MUST have a license to use his work!
I am using SSDesign - PTU kit “Pink-a-li-cious” You can purchase that here
I am using the font: Jellyka - Love and Passion
I am using Mask #173 from Aqua, you can get it here
I am using the plugins: Alien Eye Candy 5
I am using Drop Shadow 2 Vert, 2 Hori, Opacity 90, Blur 2 Color #202020
Pieces of the kit used in this tutorial are
Paper 8
Paper 9
Frame 4
Element 69
Element 61
Element 5
Element 37
Element 51
Element 46
Element 43
Element 42
Element 12
Element 33
Element 16
You must have working knowledge of PSP to complete this tutorial. This tutorial was written using PSPXII
Open new Canvas 600*600
Open Paper 9 and resize to 600*600. Paste apply mask and resize to your liking, Merge Group,
Paste Frame 4 to canvas, resize to your liking.
Open paper 4, resize to 600*600. Using your Magic Wand, select the inside of your frame, go to Selections, Modify, Expand, 5 pixels. Select okay, new layer under the frame, Flood fill, deselect
Paste CU tube between paper and Frame. Using your Magic Wand, select the inside of your frame, go to Selections, Modify, Expand, 5 pixels, select okay, invert select and delete, leaving only the part of the tube you wanted inside the frame, apply Hard Light, drop Shadow.
Paste Full tube, place to your liking, drop shadow
Element 69, resize and place bottom Right Hand Corner, duplicate, mirror, flip
Element 61, resize and place Bottom left hand corner, Duplicate, Mirror, flip, drop shadow
Element 5 resize and place to your liking, drop Shadow
Element 37, resize and place to your liking, drop Shadow
Element 51, resize and place to your liking, drop shadow
Element 46, resize and place to your liking, drop shadow
Element 43, resize and place to your liking, drop shadow
Element 42, resize and place to your liking, drop shadow
Element 12, resize and place to your liking, drop shadow
Element 33, resize and place to your liking, drop shadow
Element 16, resize and place to your liking, drop shadow
Resize the signature if needed
The name. Using Jellyka - Love and Passion Size 26, color ##363c4a. Alien Eye Candy 5, Impact, Gradient Glow Color #f84889:
Drop Shadow to your liking
Add your copyright information and license number before save
Friday, January 18, 2013
PTU City Bling Tut

Any resemblance to any other tutorial or signature is merely coincidental and is not intended.
I am using the artwork of Alex Prihodko –You can purchase His artwork and a license to use them HERE you MUST have a license to use his work
I am using the font: Teaspoon Display
I am using plugins:Alien Eye Candy 5 Impact, Gradient Glow
I am using “City Bling” From Inzpiredcreationz which you can purchase here
I am using Mask CheriMask2,from the Creative Misfits Collab you can get it here
I am using Drop Shadow 2 Vert, 2 Hori, Opacity 90, Blur 2 Color #202020
Pieces of the kit used in this tutorial are
Paper 8
Paper 15
Frame 2
City Scene 1
Disco Ball 3
Light Ray
Bar Table
Cocktail 1
Nail Polish 2
Cupcake 2
Purse 1
Limo
You must have working knowledge of PSP to complete this tutorial. This tutorial was written using PSPXII
Open new Canvas 600*600
Open paper 8 and resize to 600*600. Apply mask and resize to your liking, Merge Group
c/p Frame 2, resize to your liking, Paste resized Paper 15 under the mask, use magic wand, select the inside of your frame, Selections, Modify, Expand, pixels 3, okay, invert selection, delete, leaving the paper inside your frame
City Scene 3, Paste between the frame and Paper 18, resize to your liking
c/p your tube, I used just her head, repeat process above with the magic wand. Duplicate. Soft Light the Duplicate layer. Original Layer, blur, Gaussian Blur, 4.0, drop Shadow
C/p Tube again over the top of the frame, mirror and resize to your liking. Drop Shadow
DiscoBall3, Resize and place to your liking, under the CU of the tube and the paper, repeat magic wand so it's only in the frame, drop shadow
Light Ray, Place under the upper left corner of the frame,Over the top of the Frame, repeat with magic wand so the light is ONLY within the frame
Bar Table resize and place, lower left corner, drop Shadow
Cocktail 1, Resize and Place to your liking, so it's sitting on the bar table, Drop Shadow
Nail Polish 2, resize and place to your liking, Drop Shadow
Cupcake2, resize,and place to your liking, Drop Shadow
Purse1,place to your liking, Drop Shadow
Limo, resize and place to your liking, drop Shadow
Resize the signature if needed
The name:. Using Teaspoon Display Script size 36 Colors #000000, Apply Gradient Glow, then Drop Shadow
Add your copyright information and license number before save
Tuesday, January 15, 2013
New Exclusive PTU kit - Teenage Dream

Let's go all the way tonight
No regrets, just love
We can dance until we die
You and I, we'll be young forever
You make me feel like I'm living a teenage dream
The way you turn me on, I can't sleep
Let's runaway and don't ever look back
Don't ever look back
My heart stops when you look at me
Just one touch, now baby I believe
This is real, so take a chance
And don't ever look back, don't ever look back
Black, White, Pink, Purple and Turquoise! A little bit Valentine, a little bit punkish.
10 Papers 800*800 Tagger sized
60 elements
You can find this Kit ONLY here at Scrap Candy
Monday, January 14, 2013
Broken Cupid Snags


Subscribe to:
Posts
(Atom)
MY BLINKIE

Facebook Me
Stores I Sell In


Who I CT For

 "
"
CU Licenses