Sunday, June 28, 2015
Formerly PTU now FTU - Pride Kit

Embrace who you are, cause baby you were born this way!
10 Papers 800*800 Tagger Sized
70 Elements
Download your Fabulous Freeie here

Monday, June 22, 2015
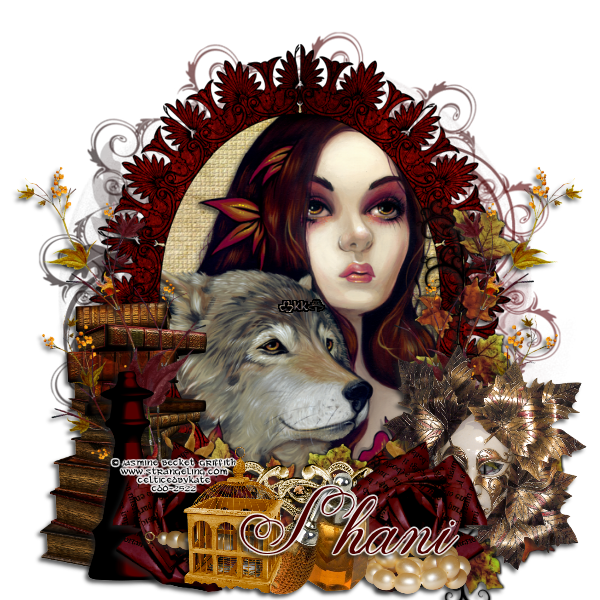
Kimmy PTU Tut
Any
resemblance to any other tutorial or signature is merely coincidental
and is not intended.
I
am using the artwork of Jasmine
Becket-Griffith
–. You can purchase this artwork and a license to use them HERE
you MUST have a license to use this work (37-3)
I
am using the font: Anglia
Script
I
am using the Plugins: Alien Eye Candy 5,
I
am using mask of your choice
I
am using Drop Shadow -3 Vert, 3 Hori, Opacity 74, Blur 5.8 Color
#202020
Pieces
of the kit used in this tutorial are
Paper
3
Paper
11
Frame
9
Border
Tag
2
Books
Flower7
Chess
Piece
Mask
Flower
1
Pearls
Perfume
Bird
Cage
You
must have working knowledge of PSP to complete this tutorial. This
tutorial was written using PSPX6
Open
new Canvas 600*600
New
Layer, flood fill with Paper 3,
Apply mask and resize to your liking, Merge Group
C/P
Frame 9,
resize to your liking, Use Magic wand, select inside of the frame,
Selections - expand, 5 pixels, New Layer, Flood fill with Paper 11
Paste
Tube between Frame 9 and Paper 11, Select paper layer, invert, select
Tube, delete, drop shadow.
Border,
resize and Place to your liking, drop shadow
Tag
2, resize and Place to your liking, drop shadow
Books,
resize and Place to your liking, drop shadow
Flower7,
resize and Place to your liking, duplicate, mirror, drop shadow
Chess
Piece, resize and Place to your liking, drop shadow
Mask,
resize and Place to your liking, drop shadow
Flower
1, resize and Place to your liking, duplicate, mirror, drop shadow
Pearls,
resize and Place to your liking, drop shadow
Perfume,
resize and Place to your liking, drop shadow
Bird
Cage, resize and Place to your liking, drop shadow
Resize
the signature if needed
The
name: I am using the font: Anglia
Script,
size 20, #4a0100,
Apply Eye Candy #ffffff, Drop Shadow

Add
your copyright information and license number before save
Star Faerie PTU Tutorial

Any
resemblance to any other tutorial or signature is merely coincidental
and is not intended.
I
am using the artwork of Misticheskya
–. You can purchase this artwork and a license to use them HERE
you MUST have a license to use this work (Faerie)
I
am using the font: Wizard
of the Moon
I
am using the Plugins: Alien Eye Candy 5,
I
am using Mask
2 from the kit
I
am using Drop Shadow -3 Vert, 3 Hori, Opacity 74, Blur 5.8 Color
#202020
Pieces
of the kit used in this tutorial are
Paper
8
Paper
9
Element
12
Element
34
Element
35
Element
75
Element
27
Element
46
Element
79
Element
8
Element
81
Element
1
You
must have working knowledge of PSP to complete this tutorial. This
tutorial was written using PSPX6
Open
new Canvas 600*600
New
Layer, flood fill with Paper 8,
Apply mask and resize to your liking, Merge Group
C/P
Element
12,
resize to your liking, Use Magic wand, select inside of the frame,
Selections - expand, 5 pixels, New Layer, Flood fill with Paper 9
Paste
Close up Tube between Paper 9
and Element
12.
Select paper layer, select all, float, invert, Select Tube Layer
Delete. Duplicate,
apply Gaussian blur 3.0, drop shadow, Luminance (L) to Original. To
Copy Set to Soft light and drop Opacity to 75%.
Paste
Full tube, resize and place to your liking, drop shadow
Element
34, resize and Place to your liking, drop shadow
Element
35, resize and Place to your liking, drop shadow
Element
75, resize and Place to your liking, drop shadow
Element
27, resize and Place to your liking, drop shadow
Element
46, resize and Place to your liking, drop shadow
Element
79, resize and Place to your liking, drop shadow
Element
8, resize and Place to your liking, drop shadow
Element
81, resize and Place to your liking, drop shadow
Element
1, resize and Place to your liking, drop shadow
Resize
the signature if needed
The
name: I am using the font: Wizard
of the Moon,
size 20, #463189,
Apply Eye Candy #ffffff, Drop Shadow
Add
your copyright information and license number before save
Thursday, June 18, 2015
American Pride PTU Tut


Any
resemblance to any other tutorial or signature is merely coincidental
and is not intended.
I
am using the artwork of Arthur
Crowe
–. You can purchase this artwork and a license to use them HERE
you MUST have a license to use this work (Sexy
Rose American Babe)
I
am using the font: Pentagon
I
am using the Plugins: Alien Eye Candy 5, Gradient Glow
I
am using mask of your choice
I
am using Drop Shadow -3 Vert, 3 Hori, Opacity 74, Blur 5.8 Color
#202020
Pieces
of the kit used in this tutorial are
Paper
10
Paper
17
Element
43
Element
92
Element
66
Element
36
Element
41
Element
33
Element
82
Element
28
Element
26
Element
57
Element
5
Element
91
Element
58
You
must have working knowledge of PSP to complete this tutorial. This
tutorial was written using PSPX6
Open
new Canvas 600*600
New
Layer, flood fill with Paper 10,
Apply mask and resize to your liking, Merge Group
C/P
Element
43,
resize to your liking, Use Magic wand, select inside of the frame,
Selections - expand, 5 pixels, New Layer, Flood fill with Paper 17
Paste
Close up Tube between Paper 17
and Element
43.
Select paper layer, select all, float, invert, Select Tube Layer
Delete, Select
paper layer, select all, float, invert, Select Tube Layer
Delete. Duplicate, on Original apply Gaussian
Blur 3.0, Drop Shadow. On Copy Change Blend Layer to Soft Light, Drop
Opacity 60%
Paste
Full tube, resize and place to your liking, drop shadow
Element
92,
resize and Place to your liking, drop shadow
Element
66, resize and Place to your liking, drop shadow
Element
36, resize and Place to your liking, drop shadow
Element
41, resize and Place to your liking, drop shadow
Element
33, resize and Place to your liking, drop shadow
Element
82, resize and Place to your liking, drop shadow
Element
28, resize and Place to your liking, drop shadow
Element
26, resize and Place to your liking, drop shadow
Element
57, resize and Place to your liking, drop shadow
Element
5, resize and Place to your liking, drop shadow
Element
91, resize and Place to your liking, drop shadow
Element
58, resize and Place to your liking, apply Eye
Shadow #ffffff, drop shadow
Resize
the signature if needed
The
name: I am using the font: Pentago,
size 20, #292438,
Apply Eye Candy #ffffff, Drop Shadow
Add
your copyright information and license number before save
New PTU Kit - Delicate Grace


Romantic Butterfly PTU Tut

Any
resemblance to any other tutorial or signature is merely coincidental
and is not intended.
I
am using the artwork of Very
Many
–. You can purchase this artwork and a license to use them HERE
you MUST have a license to use this work (Butterfly)
I
am using the font: love
Letters
I
am using the Plugins: Alien Eye Candy 5,
I
am using mask of your choice
I
am using Drop Shadow -3 Vert, 3 Hori, Opacity 74, Blur 5.8 Color
#202020
Pieces
of the kit used in this tutorial are
Paper
11
Paper
4
Element
37
Element
66
Element
88
Element
87
Element
68
Element
04
Element
64
Element
06
Element
19
Element
17
Element
75
You
must have working knowledge of PSP to complete this tutorial. This
tutorial was written using PSPX6
Open
new Canvas 600*600
New
Layer, flood fill with Paper 1,
Apply mask and resize to your liking, Merge Group
C/P
Element
11,
resize to your liking, Use Magic wand, select inside of the frame,
Selections - expand, 5 pixels, New Layer, Flood fill with Paper 4
Paste
Full tube, resize and place to your liking, Duplicate,
on Original – Guassian Blur 3.0, drop Shadow. On Copy change blend
mode to soft light
Element 66, resize and Place to your liking, drop shadow
Element 88, resize and Place to your liking, drop shadow
Element 87, resize and Place to your liking, drop shadow
Element 68, resize and Place to your liking, drop shadow
Element 04, resize and Place to your liking, drop shadow
Element 64, resize and Place to your liking, drop shadow
Element 06, resize and Place to your liking, drop shadow
Element 19, resize and Place to your liking, drop shadow
Element 17, resize and Place to your liking, drop shadow
Element 75, resize and Place to your liking, drop shadow
The
name: I am using the font: Love
Letters,
size 20, #b76aeb,
Apply Eye Candy #ffffff, Drop Shadow
Add
your copyright information and license number before save
Wonderful PTU Tut

Any
resemblance to any other tutorial or signature is merely coincidental
and is not intended.
I
am using the artwork of Pin
Up Toons
–. You can purchase this artwork and a license to use them HERE
you MUST have a license to use this work (173-2)
I
am using the font: Wonderlism
I
am using the Plugins: Alien Eye Candy 5,
I
am using mask of your choice
I
am using Drop Shadow -3 Vert, 3 Hori, Opacity 74, Blur 5.8 Color
#202020
Pieces
of the kit used in this tutorial are
Paper
14
Paper
17
Element
122
Element
5
Element
169
Element
101
Element
14
Element
118
Element
100
Element
110
Element
54
Element
91
Element
68
Element
81
Element
121
Element
123
Element
160
Element
149
You
must have working knowledge of PSP to complete this tutorial. This
tutorial was written using PSPX6
Open
new Canvas 600*600
New
Layer, flood fill with Paper 14,
Apply mask and resize to your liking, Merge Group
C/P
Element
122,
resize to your liking, Use Magic wand, select inside of the frame,
Selections - expand, 5 pixels, New Layer, Flood fill with Paper 17
Paste
Close up Tube between Paper 17
and Element.
Select paper layer, select all, float, invert, Select Tube Layer
Delete, Change
Blend Layer to Luminance, drop Opacity to 85%
Paste
Full tube, resize and place to your liking, drop shadow
Element
5,
resize and Place to your liking, drop shadow
Element
169, resize and Place to your liking, drop shadow
Element
101, resize and Place to your liking, drop shadow
Element
14, resize and Place to your liking, drop shadow
Element
118, resize and Place to your liking, drop shadow
Element
100, resize and Place to your liking, drop shadow
Element
110, resize and Place to your liking, drop shadow
Element
54, resize and Place to your liking, drop shadow
Element
91, resize and Place to your liking, drop shadow
Element
68, resize and Place to your liking, drop shadow
Element
81, resize and Place to your liking, drop shadow
Element
121, resize and Place to your liking, drop shadow
Element
123, resize and Place to your liking, drop shadow
Element
160, resize and Place to your liking, drop shadow
Element
149, resize and Place to your liking, drop shadow
Resize
the signature if needed
The
name: I am using the font: End of the Dream, size 20, #f04f95, Apply
Eye Candy #ffffff, Drop Shadow
Add
your copyright information and license number before save
Timekeeper PTU Tut

Any
resemblance to any other tutorial or signature is merely coincidental
and is not intended.
I
am using the artwork of Martin
Abel
–. You can purchase this artwork and a license to use them HERE
you MUST have a license to use this work (46-2)
I
am using the font: Extra
Ornamental No2
I
am using the Plugins: Alien Eye Candy 5,
I
am using mask of your choice
I
am using Drop Shadow -3 Vert, 3 Hori, Opacity 74, Blur 5.8 Color
#202020
Pieces
of the kit used in this tutorial are
Paper
4
Paper
19
Element
1
Element
149
Element
21
Element
64
Element
138
Element
127
Element
119
Element
16
You
must have working knowledge of PSP to complete this tutorial. This
tutorial was written using PSPX6
Open
new Canvas 600*600
New
Layer, flood fill with Paper 4,
Apply mask and resize to your liking, Merge Group
C/P
Element
1,
resize to your liking, Use Magic wand, select inside of the frame,
Selections - expand, 5 pixels, New Layer, Flood fill with Paper 19
Paste
Close up Tube between Paper 12
and Frame 5. Select paper layer, select all, float, invert, Select
Tube Layer Delete. Duplicate,
on Original apply Guassian Blur 3.0, Change Blend Layer to Luminance
(L), Drop Shadow. On Copy Change Blend Layer to Soft Light, Drop
Opacity 60%
Paste
Full tube, resize and place to your liking, drop shadow
Element
149, resize and Place to your liking, drop shadow
Element
21, resize and Place to your liking, drop shadow
Element
64, resize and Place to your liking, drop shadow
Element
138, resize and Place to your liking, drop shadow
Element
127, resize and Place to your liking, drop shadow
Element
119, resize and Place to your liking, drop shadow
Element
16, resize and Place to your liking, drop shadow
Resize
the signature if needed
The
name: I am using the font: Extra
Ornamental No2,
size 20, #480d03,
Apply Eye Candy #f4d8a7
Drop Shadow
Add
your copyright information and license number before save
Subscribe to:
Comments
(Atom)
MY BLINKIE

Facebook Me
Stores I Sell In


Who I CT For

 "
"
CU Licenses