Tuesday, January 31, 2012
PTU Happy Birthday Tut

Any resemblance to any other tutorial or signature is merely coincidental and is not intended.
I am using the artwork of Elias Chatzoudis –. You can purchase his artwork and a license to use them HERE you MUST have a license to use his work
I am using the artwork of Elias Chatzoudis –. You can purchase his artwork and a license to use them HERE you MUST have a license to use his work
I am using the font KR Birthday Letters
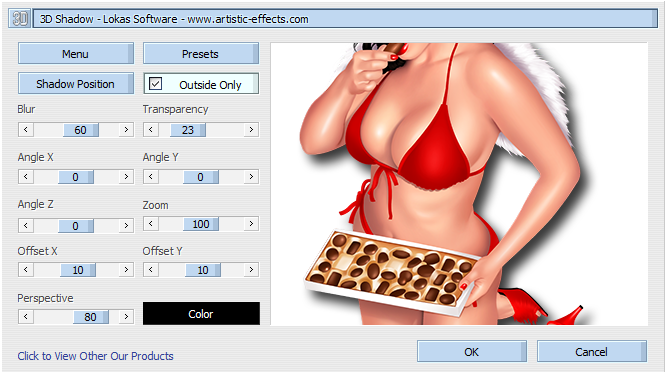
I am using plugins:, Apply Lokas 3-D plug in
Pieces of the kit used in this tutorial are
Paper 06
Paper 10
Paper 08
Paper 13
Paper 13
Frame 03
Frame 04
Confetti
Word Art 1
Gift 04
Gift03
Word Art 02
You must have working knowledge of PSP to complete this tutorial. This tutorial was written using PSPXII
Open new Canvas 600*600
Open paper 06 and resize to 600*600. Paste apply mask and resize to your liking, Merge Group
Open Frame 03 c/p to canvas, resize and rotate to your liking
Open Paper 10, resize to 600*600. Paste under your frame, using your Magic Wand, select the inside of your frame, go to Selections, Modify, Expand, 5 pixels. Select okay, invert selection and delete leaving the inside of the frame with your paper
Open frame 04, c/p to canvas, resize to your liking
Open Paper 08, resize to 600*600. Paste under your frame, using your Magic Wand, select the inside of your frames, go to Selections, Modify, Expand, 5 pixels. Select okay, invert selection and delete leaving the inside of the frame with your paper
Take your tube and paste it under frame 03, I used the Middle, mirrored and set it to luminance legacy.
Use the full tube and place the cake layer under the left oval of frame 04. Select the oval just like you did above, delete leaving just the cake, duplicate, mirror and place under the right oval. Use the face for the middle frame. Set all to Hard light.
Paste your full tube layer on top, resize and place to your liking, Apply Lokas 3-D plug in
Confetti, resize and paste over your mask
Word Art 1, resize and place to your liking,
Jack02, Resize and place to your liking
Gift04 resize and place to your liking
Gift 03 resize and place to your liking
Word Art 02
Apply drop shadow to your taste. Mine are all 2*2’s
Resize the signature if needed
The name. Using the KR Birthday Letters size 3 Colors Fill with Paper 13,
Drop Shadow to your liking
Add your copyright information and license number before save
Monday, January 30, 2012
CT CALL!!!

PTU Under the Sea

Any resemblance to any other tutorial or signature is merely coincidental and is not intended.
I am using the artwork of Tony T–. You can purchase his artwork and a license to use them HERE you MUST have a license to use his work
I am using the artwork of Tony T–. You can purchase his artwork and a license to use them HERE you MUST have a license to use his work
I am using the font: Yellowjacket
I am using plugins: Lokas 3-D
Pieces of the kit used in this tutorial are
PP2
PP10
Frame
Beach
Sandspill4
Cattails
Bottle
Tree
Seagull
Shells
You must have working knowledge of PSP to complete this tutorial. This tutorial was written using PSPXII
Open new Canvas 600*600
Open PP2 and resize to 600*600. Paste apply mask and resize to your liking, Merge Group,
Open Frame c/p to canvas, resize and rotate to your liking.
Open PP10, resize to 600*600. Paste under your frame, using your Magic Wand, select the inside of your frame, go to Selections, Modify, Expand, 3 pixels. Select okay, invert selection and delete leaving the inside of the frame with your paper.
Take your tube and paste it under the frame, I used the close up, mirrored and set it to Luminance Legacy
Paste your full tube layer on top, resize and place to your liking, Apply Lokas 3-D plug in
Beach, Paste, resize and place to your liking
Sandspill4, Paste, resize and place to your liking
Cattails, Paste, resize and place to your liking
Bottle, Paste, resize and place to your liking
Tree, Paste, resize and place to your liking
Seagull, Paste, resize and place to your liking
Shells, Paste, resize and place to your liking
Apply drop shadow to your taste. Mine are all 2*2’s
Resize the signature if needed
The name. Yellowjacket, size 30 color #6abbcb,
Drop Shadow to your liking
Add your copyright information and license number before save
Tuesday, January 24, 2012
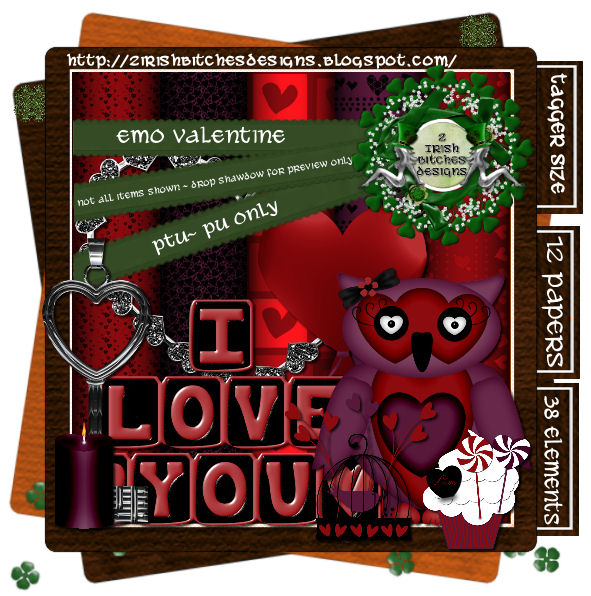
new PTU kit, Emo Valentine
Monday, January 23, 2012
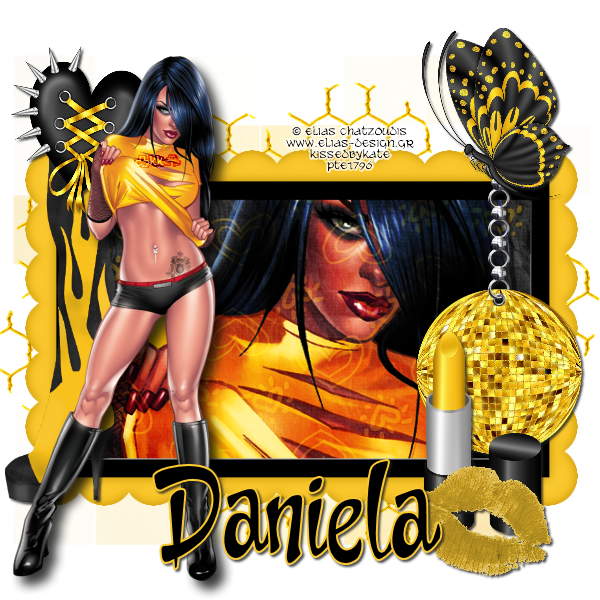
PTU Jam Master

Any resemblance to any other tutorial or signature is merely coincidental and is not intended.
I am using the artwork of Very Many. You can purchase their artwork and a license to use them HERE you MUST have a license to their work
I am using the artwork of Very Many. You can purchase their artwork and a license to use them HERE you MUST have a license to their work
I am using the font: My Nerd
Pieces of the kit used in this tutorial are
PP7
Record
Music Notes
Car
Drums
Equalizer
Headphones2
Guitar
Glitter Note
You must have working knowledge of PSP to complete this tutorial. This tutorial was written using PSPXII
Open new Canvas 600*600
You must have working knowledge of PSP to complete this tutorial. This tutorial was written using PSPXII
Open new Canvas 600*600
Open PP7 and resize to 600*600. Paste apply mask and resize to your liking, Merge Group,
Open Record c/p to canvas, resize to your liking.
Take your close up tube and paste it on top of the record. Use the wand to select the outside of record, and select the outside of the record, invert and delete leaving the close up “inside” the Record. Apply Luminance Legacy. Paste full tube, resize and Place to your liking
Music Notes, resize and place under everything but the Mask
Car, resize to your liking and place to your liking
Drums, resize and place to your liking
Equalizer, resize and place to your liking
Headphones2 resize and place to your liking
Guitar resize and place to your liking
Glitter Note, resize and place to your liking
Apply drop shadow to your taste. Mine are all 2*2’s
Resize the signature if needed
The name. Using My Nerd size 30 Color #0085ca. Select from Vector Layer, Expand by 3 pixels, New Layer, Floor fill with fffff, drop shadow
Add your copyright information and license number before save
Thursday, January 19, 2012
PTU Who's that Chick
Any resemblance to any other tutorial or signature is merely coincidental and is not intended.
I am using the artwork of Elias Chatzoudis –. You can purchase his artwork and a license to use them HERE you MUST have a license to use her work
I am using the artwork of Elias Chatzoudis –. You can purchase his artwork and a license to use them HERE you MUST have a license to use her work
I am using the font: CCCheekyMonkey
I am using plugins: Lokas 3-D
I am using PTU Scrazy Scraps How’s that Chick which you can download here
I am using Vix Mask 294, you can get that here
Pieces of the kit used in this tutorial are
Paper 8
Paper 13
Frame 1
Element 16
Element 31
Element 32
Element 29
Element 28
Element 14
Element 8
You must have working knowledge of PSP to complete this tutorial. This tutorial was written using PSPXII
Open new Canvas 600*600
Open paper 8 and resize to 600*600. Paste apply mask and resize to your liking, Merge Group
Open Frame 1 c/p to canvas, resize to your liking
Open Paper 12, resize to 600*600. Paste under your frame, using your Magic Wand, select the inside of your frame, go to Selections,Modify, Expand, 5 pixels. Select okay, invert selection and delete leaving the inside of the frame with your paper
Close up of your tube, paste it under your frame. Use your magic wand to select the background paper, select your tube layer, invert, delete, leaving the tube inside the frame. Apply Hard Light
Paste your full tube layer on top, resize and place to your liking, apply Lokas 3-DElement 16, resize and place Over the top of the mask
Element 31, Resize and place to your liking
Element 32, , resize and place on the top of Element 31
Element 29, Resize and place to your liking
Element 28, Resize and place to your liking
Element 14, Resize and place to your liking
Element 8, Resize and place to your liking
Apply drop shadow to your taste. Mine are all 2*2’s
Resize the signature if needed
The name. CCCheekyMonkey size 30, color 00000, stroke color #f9c82f, width 2
Drop Shadow to your liking
Add your copyright information and license number before save
PTU I want Candy

Any resemblance to any other tutorial or signature is merely coincidental and is not intended.
I am using the artwork of Ismeal Rac –. You can purchase his artwork and a license to use them HERE you MUST have a license to use his work
I am using the font Candy Randy
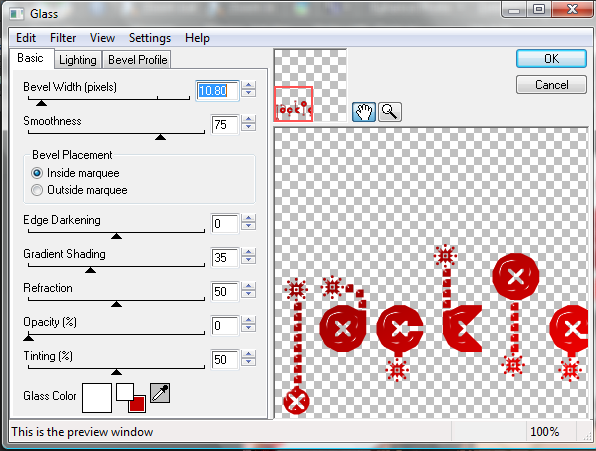
I am using plugins: Lokas 3-D, Eye Candy 3.1 Glow, Eye Candy 4000, Glass
Pieces of the kit used in this tutorial are
Paper 04
Paper 03
Frame 01
Cupcake 03
Scatter03
Scatter 04
Balloon 01
Strawberry 01
Candy 09
Cherry01
Candy05
Wordart02
You must have working knowledge of PSP to complete this tutorial. This tutorial was written using PSPXII
Open new Canvas 600*600
You must have working knowledge of PSP to complete this tutorial. This tutorial was written using PSPXII
Open new Canvas 600*600
Open paper 04 and resize to 600*600. Paste apply mask and resize to your liking, Merge Group
Open Frame 01 c/p to canvas, resize to your liking and I flipped mine vertically
Open Paper 17, resize to 600*600. Paste under your frame, using your Magic Wand, select the inside of your frame, go to Selections, Modify, Expand, 5 pixels. Select okay, invert selection and delete leaving the inside of the frame with your paper
Take your tube and paste it under the frame, I used the close up, Mirror and then duplicate. Original layer set Guassian blur to 3.0. Copy set to soft light. Drop shadow on original layer of your choice. Paste your full tube layer on top, resize and place to your liking, Apply Lokas 3-D plug in. Paste Cupcake03 behind full tube and move it so it looks like the tube is sitting on the cupcake
Scatter03, resize and paste over your mask,
Scatter04, Resize and place to your liking
Balloon resize and place to your liking, duplicate and Mirror
Strawberry01 Resize and place to your liking
Candy09, resize and place to your liking
Cherry01 Resize place to your liking
Candy05, resize and place to your liking
Wordart 02, resize and place to your liking, Eye Candy 3.1 Glow, Color fffff, pixel width 1, fat
Apply drop shadow to your taste. Mine are all 2*2’s
Resize the signature if needed
The name. Candy Randy size 3
Colors #a6ba44, Select Vector object, Expand 3, Add new Layer, Fill with fffff, Apply Eye Candy 4000 Glass
Drop Shadow to your liking
Add your copyright information and license number before save
Monday, January 9, 2012
New PTU Kit!

Available soon in stores. Denim and Lace. Perfect for Valentines.
Available at Fabulous Art Beginnings or The Psp Project
Subscribe to:
Posts
(Atom)
MY BLINKIE

Facebook Me
Stores I Sell In


Who I CT For

 "
"
CU Licenses