Monday, April 27, 2015
Sugar Skull PTU Tut


Any resemblance to any other tutorial or signature is merely coincidental and is not intended.
I am using the artwork of Alfadesire –. You can purchase this artwork and a license to use them HERE you MUST have a license to use this work (Sugar Skull)
I am using the font: Brother Tattoo
I am using the Plugins: Alien Eye Candy 5,
I am using "Sweet Sugar Skull" From Hania Designs, you can find it here
I am using mask of your choice
I am using Drop Shadow -3 Vert, 3 Hori, Opacity 74, Blur 5.8 Color #202020
Pieces of the kit used in this tutorial are
Paper 8
Paper 5
93
6
8
72
9
35
21
36
You must have working knowledge of PSP to complete this tutorial. This tutorial was written using PSPX6
Open new Canvas 600*600
New Layer, flood fill with Paper 8 , Apply mask and resize to your liking, Merge Group
C/P Element 93, resize to your liking, Use Magic wand, select inside of the frame, Selections - expand, 5 pixels, New Layer, Flood fill with Paper 5
Paste Close up Tube between Element 93 and Paper 5. Select paper layer, select all, float, invert, Select Tube Layer Delete, Apply Xero Porcelain, and then Xero Radiance, Drop Shadow, Duplicate. Apply Guassian blur 5.0 to copy, then set to Soft Light and drop Opacity to 60%.


Paste Full tube, resize and place to your liking, drop shadow
6, resize and Place to your liking, drop shadow
8, resize and Place to your liking, drop shadow
72, resize and Place to your liking, drop shadow
9, resize and Place to your liking, drop shadow
35, resize and Place to your liking, drop shadow
21, resize and Place to your liking, drop shadow
36, resize and Place to your liking, apply Eye Candy #ffffff, drop shadow
Resize the signature if needed
The name: I am using the font: Brother Tattoo, size 20, #000000, Apply Eye Candy #ffffff, Drop Shadow

Add your copyright information and license number before save

Sunday, April 26, 2015
New PTU Kit - Walk in the Park

Friday, April 24, 2015
Dark Desires PTU Tut

Any resemblance to any other tutorial or signature is merely coincidental and is not intended.
I am using the artwork of Anna Marine –. You can purchase this artwork and a license to use them HERE you MUST have a license to use this work (9-1)
I am using the font: Blackwood Castle
I am using the Plugins: Alien Eye Candy 5,
I am using "Dark Dreams" From Tasha's Playground, you can find her stores on her blog
I am using mask of your choice
I am using Drop Shadow -3 Vert, 3 Hori, Opacity 74, Blur 5.8 Color #202020
Pieces of the kit used in this tutorial are
Paper 8
Paper 6
Frame 4
e20
e5
e11
e15
e4
e19
e30
e1
e29
e38
You must have working knowledge of PSP to complete this tutorial. This tutorial was written using PSPX6
Open new Canvas 600*600
New Layer, flood fill with Paper 8, Apply mask and resize to your liking, Merge Group
C/P Frame 4, resize to your liking, Use Magic wand, select inside of the frame, Selections - expand, 5 pixels, New Layer, Flood fill with Paper 6
Paste Full tube, resize and place to your liking, drop shadow
e20, resize and Place to your liking, drop shadow
e5, resize and Place to your liking, Duplicate, Mirror, drop shadow
e11, resize and Place to your liking, Duplicate, Mirror, drop shadow
e15, resize and Place to your liking, Duplicate, Mirror, drop shadow
e4, resize and Place to your liking, Duplicate, Mirror, drop shadow
e19, resize and Place to your liking, drop shadow
e30, resize and Place to your liking, drop shadow
e1, resize and Place to your liking, drop shadow
e29, resize and Place to your liking, drop shadow
e38, resize and Place to your liking, drop shadow
Resize the signature if needed
The name: I am using the font: Blackwood Castle size 20, #000000, Apply Eye Candy #ffffff, Drop Shadow
Add your copyright information and license number before save
Sunday, April 19, 2015
New PTU Kit - Tulip Tiptoe

Friday, April 17, 2015
Blood Hunter PTU Tut


Any resemblance to any other tutorial or signature is merely coincidental and is not intended.
I am using the artwork of Art of Freya –. You can purchase this artwork and a license to use them HERE you MUST have a license to use this work (Bloodsucker)
I am using the font: Rise Inside
I am using the Plugins: Alien Eye Candy 5,
I am using "The Hunter" From Wicked Princess Scraps, you can find it here
I am using mask of your choice
I am using Drop Shadow -3 Vert, 3 Hori, Opacity 74, Blur 5.8 Color #202020
Pieces of the kit used in this tutorial are
Paper 20
Paper 10
Element 7
Castle
Flower 1
Blood Drink 2
Blood 3
Bird 1
Flower 3
Cloud 2
Cat
Bottle 7
Bottle 2
You must have working knowledge of PSP to complete this tutorial. This tutorial was written using PSPX6
Open new Canvas 600*600
New Layer, flood fill with Paper 20, Apply mask and resize to your liking, Merge Group
C/P Frame 7, resize to your liking, Use Magic wand, select inside of the frame, Selections - expand, 5 pixels, New Layer, Flood fill with Paper 10
Paste Full tube, resize and place to your liking, drop shadow
Castle, resize and Place to your liking, drop shadow
Flower 1, resize and Place to your liking, duplicate, mirror, drop shadow
Blood Drink 2, resize and Place to your liking, drop shadow
Blood 3, resize and Place to your liking, drop shadow
Bird 1, resize and Place to your liking, drop shadow
Flower 3, resize and Place to your liking, drop shadow
Cloud 2, resize and Place to your liking, drop shadow
Cat, resize and Place to your liking, drop shadow
Bottle 7, resize and Place to your liking, drop shadow
Bottle 2, resize and Place to your liking, drop shadow
Resize the signature if needed
The name: I am using the font: Rise Inside, size 20, #000000, Apply Eye Candy #ffffff, Drop Shadow
Add your copyright information and license number before save
Easter Beach PTU Tut


Any resemblance to any other tutorial or signature is merely coincidental and is not intended.
I am using the artwork of Art of Freya –. You can purchase this artwork and a license to use them HERE you MUST have a license to use this work (Hot Zombeaster)
I am using the font: Spinstee
I am using the Plugins: Alien Eye Candy 5,
I am using "Hot Zombeaster" From Happy Pumpkin Studios, you can find it here
I am using mask of your choice
I am using Drop Shadow -3 Vert, 3 Hori, Opacity 74, Blur 5.8 Color #202020
Pieces of the kit used in this tutorial are
Paper 1
Paper 3
Element 31
Element 9
Element 38
Element 16
Element 18
Element 14
Element 11
Element 4
Element 7
You must have working knowledge of PSP to complete this tutorial. This tutorial was written using PSPX6
Open new Canvas 600*600
New Layer, flood fill with Paper 1, Apply mask and resize to your liking, Merge Group
C/P Element 31, resize to your liking, Use Magic wand, select inside of the frame, Selections - expand, 5 pixels, New Layer, Flood fill with Paper 3
Paste Full tube, resize and place to your liking, drop shadow
Element 9, resize and Place to your liking, drop shadow
Element 38, resize and Place to your liking, drop shadow
Element 16, resize and Place to your liking, drop shadow
Element 18, resize and Place to your liking, drop shadow
Element 14, resize and Place to your liking, drop shadow
Element 11, resize and Place to your liking, drop shadow
Element 4, resize and Place to your liking, drop shadow
Element 7, resize and Place to your liking, drop shadow
Resize the signature if needed
The name: I am using the font: Spinstee, size 20, #cb022c, Apply Eye Candy #ffffff, Drop Shadow
Add your copyright information and license number before save
Wednesday, April 15, 2015
Cancun Beach PTU Tut

Any resemblance to any other tutorial or signature is merely coincidental and is not intended.
I am using the artwork of Very Many –. You can purchase this artwork and a license to use them HERE you MUST have a license to use this work (Alexis)
I am using the font: KG Strawberry Limeade
I am using the Plugins: Alien Eye Candy 5,
I am using "Cancun Lush Babe" From Inzpired Creationz, you can find it here
I am using mask of your choice
I am using Drop Shadow -3 Vert, 3 Hori, Opacity 74, Blur 5.8 Color #202020
Pieces of the kit used in this tutorial are
Paper 14
Paper 2
Frame 1
Splash 1
Palm Frond
Palm Tree
Bar
Sand
Fruit 1
Sign 1
Cocktails
Starfish
Clam
Beads 4
You must have working knowledge of PSP to complete this tutorial. This tutorial was written using PSPX6
Open new Canvas 600*600
New Layer, flood fill with Paper 14, Apply mask and resize to your liking, Merge Group
C/P Frame 1, resize to your liking, Use Magic wand, select inside of the frame, Selections - expand, 5 pixels, New Layer, Flood fill with Paper 2
Paste Full tube, resize and place to your liking, drop shadow
Splash 1, resize and Place to your liking
Palm Frond, resize and Place to your liking, drop shadow
Palm Tree, resize and Place to your liking, drop shadow
Bar, resize and Place to your liking, drop shadow
Sand, resize and Place to your liking, drop shadow
Fruit 1, resize and Place to your liking, drop shadow
Sign 1, resize and Place to your liking, drop shadow
Cocktails, resize and Place to your liking, drop shadow
Starfish, resize and Place to your liking, drop shadow
Clam, resize and Place to your liking, drop shadow
Beads 4, resize and Place to your liking, drop shadow
Resize the signature if needed
The name: I am using the font: KG Strawberry Limeade, size 20, #870c76 Apply Eye Candy #ffffff , Drop Shadow
Add your copyright information and license number before save
Pink Carpet Caren

Any resemblance to any other tutorial or signature is merely coincidental and is not intended.
I am using the artwork of Very Many –. You can purchase this artwork and a license to use them HERE you MUST have a license to use this work (Caren)
I am using the font: Monkey Snake
I am using the Plugins: Alien Eye Candy 5,
I am using "Pink Carpet Ready" From Inzpired Creationz, you can find it here
I am using mask of your choice
I am using Drop Shadow -3 Vert, 3 Hori, Opacity 74, Blur 5.8 Color #202020
Pieces of the kit used in this tutorial are
Paper 4
Paper 1
Frame 3
Frame 1
Lamp Post 1
Feather 2
Boa
Bling Spill 3
City Scene
Car
Glasses
Leaves 4
Perfume
Flower 2
Cock tail
Bling 3
Shoe
You must have working knowledge of PSP to complete this tutorial. This tutorial was written using PSPX6
Open new Canvas 600*600
New Layer, flood fill with Paper 4, Apply mask and resize to your liking, Merge Group
C/P Frame 3, resize to your liking, Use Magic wand, select inside of the frame, Selections - expand, 5 pixels, New Layer, Flood fill with Paper 1
Paste Close up Tube between Paper 12 and Frame 5. Select paper layer, select all, float, invert, Select Tube Layer Delete. Duplicate. Apply Guassian Blur 3.0 to Original, Drop Shadow. Apply Soft Light to Copy
Paste Full tube, resize and place to your liking, drop shadow
Frame 1, resize and Place to your liking, drop shadow
Lamp Post 1, resize and Place to your liking, drop shadow
Feather 2, resize and Place to your liking, drop shadow
Boa, resize and Place to your liking, drop shadow
Bling Spill 3, resize and Place to your liking, drop shadow
City Scene, resize and Place to your liking, drop shadow
Car, resize and Place to your liking, drop shadow
Glasses, resize and Place to your liking, drop shadow
Leaves 4, resize and Place to your liking, drop shadow
Perfume, resize and Place to your liking, drop shadow
Flower 2, resize and Place to your liking, drop shadow
Cock tail, resize and Place to your liking, drop shadow
Bling 3, resize and Place to your liking, drop shadow
Shoe, resize and Place to your liking, drop shadow
Resize the signature if needed
The name: I am using the font: Monkey Snake, size 20, #ff44b2Apply Eye Candy #ffffff & #00000, Drop Shadow

Add your copyright information and license number before save
Tuesday, April 14, 2015
The Fantastically Free Blog Train - Living on the Edge
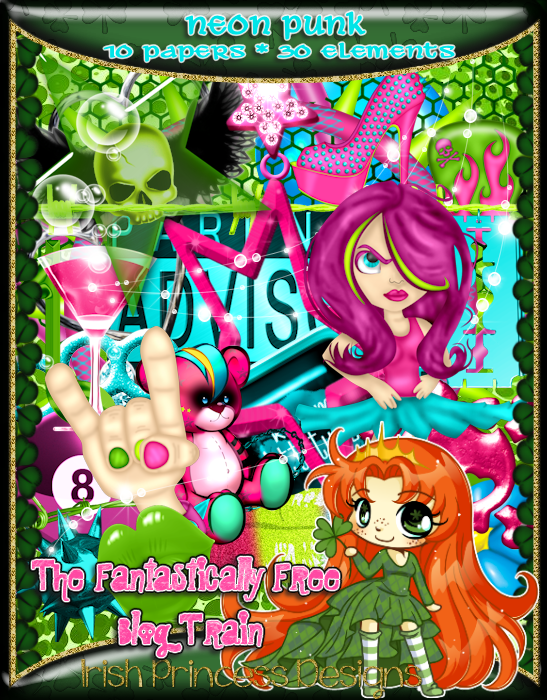
Be sure to check out all of the other stops on this train...
*******************

*******************
Irish Princess Designs <<<< You are here
You can Download mine here
Friday, April 10, 2015
Geek Girl PTU Tut


Any resemblance to any other tutorial or signature is merely coincidental and is not intended.
I am using the artwork of Alfadesire –. You can purchase this artwork and a license to use them HERE you MUST have a license to use this work (Geek Girl)
I am using the font: Amazing Ruler
I am using the Plugins: Alien Eye Candy 5,
I am using "It's love" From Inzpired Creationz, you can find it here
I am using mask of your choice
I am using Drop Shadow -3 Vert, 3 Hori, Opacity 74, Blur 5.8 Color #202020
Pieces of the kit used in this tutorial are
Paper 5
Paper 14
Frame 3
Clock 1
Flowers 2
Flowers 3
Heart Flying 3
Polaroids
Blocks 1
Butterfly 3
Key 1
Milkshake
Beads
Word Art 2
You must have working knowledge of PSP to complete this tutorial. This tutorial was written using PSPX6
Open new Canvas 600*600
New Layer, flood fill with Paper 5, Apply mask and resize to your liking, Merge Group
C/P Frame 3, resize to your liking, Use Magic wand, select inside of the frame, Selections - expand, 5 pixels, New Layer, Flood fill with Paper 14
Paste Close up Tube between Paper 12 and Frame 5. Select paper layer, select all, float, invert, Select Tube Layer Delete, apply Luminance (L), drop shadow
Paste Full tube, resize and place to your liking, drop shadow
Clock 1, resize and Place to your liking, drop shadow
Flowers 2, resize and Place to your liking, drop shadow
Flowers 3, resize and Place to your liking, drop shadow
Heart Flying 3, resize and Place to your liking, drop shadow
Polaroids, resize and Place to your liking, drop shadow
Blocks 1, resize and Place to your liking, drop shadow
Butterfly 3, resize and Place to your liking, drop shadow
Key 1, resize and Place to your liking, drop shadow
Milkshake, resize and Place to your liking, drop shadow
Beads, resize and Place to your liking, drop shadow
Word Art 2, resize and Place to your liking, drop shadow
Resize the signature if needed
The name: I am using the font: Amazing Ruler, size 20, #000000, Apply Eye Candy #ffffff, Drop Shadow
Add your copyright information and license number before save
Stardust PTU Tut

Any resemblance to any other tutorial or signature is merely coincidental and is not intended.
I am using the artwork of Rebecca Sinz –. You can purchase this artwork and a license to use them HERE you MUST have a license to use this work (Stardust)
I am using the font: England Hand DB
I am using the Plugins: Alien Eye Candy 5,
I am using "IB Jennifer Janesko 140-1" From Tasha's Playground, you can find her stores on her blog here
I am using mask of your choice
I am using Drop Shadow -3 Vert, 3 Hori, Opacity 74, Blur 5.8 Color #202020
Pieces of the kit used in this tutorial are
Paper 5
Paper 4
Frame 2
Element 4
Element 10
Element 11
Element 16
Element 15
Element 14
Element 19
You must have working knowledge of PSP to complete this tutorial. This tutorial was written using PSPX6
Open new Canvas 600*600
New Layer, flood fill with Paper 5, Apply mask and resize to your liking, Merge Group
C/P Frame 2, resize to your liking, Use Magic wand, select inside of the frame, Selections - expand, 5 pixels, New Layer, Flood fill with Paper 4
Paste Full tube, resize and place to your liking, drop shadow
Element 4, resize and Place to your liking, drop shadow
Element 10, resize and Place to your liking, duplicate, mirror, drop shadow
Element 11, resize and Place to your liking, duplicate, mirror, drop shadow
Element 16, resize and Place to your liking, duplicate, mirror, drop shadow
Element 15, resize and Place to your liking, duplicate, mirror, drop shadow
Element 14, resize and Place to your liking, duplicate, mirror, drop shadow
Element 19, resize and Place to your liking, duplicate, mirror, drop shadow
Resize the signature if needed
The name: I am using the font: England Hand DB, size 20, #3367a5, Apply Eye Candy #ffffff & #000000, Drop Shadow
Add your copyright information and license number before save
Tuesday, April 7, 2015
New PTU Kit - Eventide


Monday, April 6, 2015
Jane of the Jungle PTU Tut


Any resemblance to any other tutorial or signature is merely coincidental and is not intended.
I am using the artwork of Freya–. You can purchase this artwork and a license to use them HERE you MUST have a license to use this work (Jane of the Jungle)
I am using the font: Jurassic Park
I am using the Plugins: Alien Eye Candy 5,
I am using "Jane of the Jungle" From Gimptastic Scraps, you can find it here
I am using mask of your choice
I am using Drop Shadow -3 Vert, 3 Hori, Opacity 74, Blur 5.8 Color #202020
Pieces of the kit used in this tutorial are
Paper 9
Paper 1
Frame 1
Tree 1
Vine
Flower 3
Grass
Plant 1
Drum
Toucan
Flower 1
Rocks
Tiger
Bananas
Coconuts
You must have working knowledge of PSP to complete this tutorial. This tutorial was written using PSPX6
Open new Canvas 600*600
New Layer, flood fill with Paper 9, Apply mask and resize to your liking, Merge Group
C/P Frame 1, resize to your liking, Use Magic wand, select inside of the frame, Selections - expand, 5 pixels, New Layer, Flood fill with Paper 1
Paste Full tube, resize and place to your liking, drop shadow
Tree 1, resize and Place to your liking, drop shadow
Vine, resize and Place to your liking, drop shadow
Flower 3, resize and Place to your liking, duplicate, Mirror, drop shadow
Grass, resize and Place to your liking, duplicate, Mirror, drop shadow
Plant 1, resize and Place to your liking, duplicate, Mirror, drop shadow
Drum, resize and Place to your liking, drop shadow
Toucan, resize and Place to your liking, drop shadow
Flower 1, resize and Place to your liking, duplicate, Mirror, drop shadow
Rocks, resize and Place to your liking, drop shadow
Tiger, resize and Place to your liking, drop shadow
Bananas, resize and Place to your liking, drop shadow
Coconuts, resize and Place to your liking, drop shadow
Resize the signature if needed
The name: I am using the font: Jurassic Park, size 20, #551505, Apply Eye Candy #ffffff, Drop Shadow
Add your copyright information and license number before save
New PTU Retro Overlays - CU Okay

A Pack of 8 1000*10000 Retro Overlays, color, resize and use for your needs
Available Exclusively at Smiley Creations Shop
Subscribe to:
Posts
(Atom)
MY BLINKIE

Facebook Me
Stores I Sell In


Who I CT For

 "
"
CU Licenses